
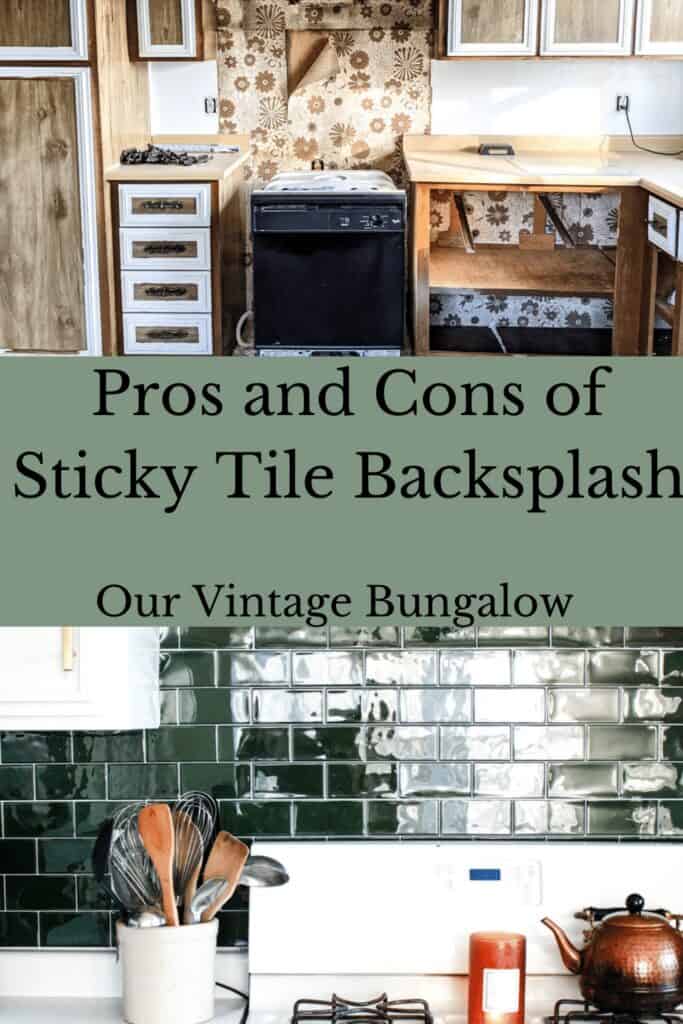
Have you ever needed a quick and easy kitchen makeover idea? Maybe you’re in an affordable but ugly kitchen rental or your need a temporary kitchen makeover before spending big money on your dream kitchen. Here are the pros and cons of peel and stick tile backsplash for a kitchen update on a budget.

I may earn a small commission through your purchase through any Amazon Affiliate links on this post. This is at no additional cost to you. All recommendations are my own because I have used and like each product.
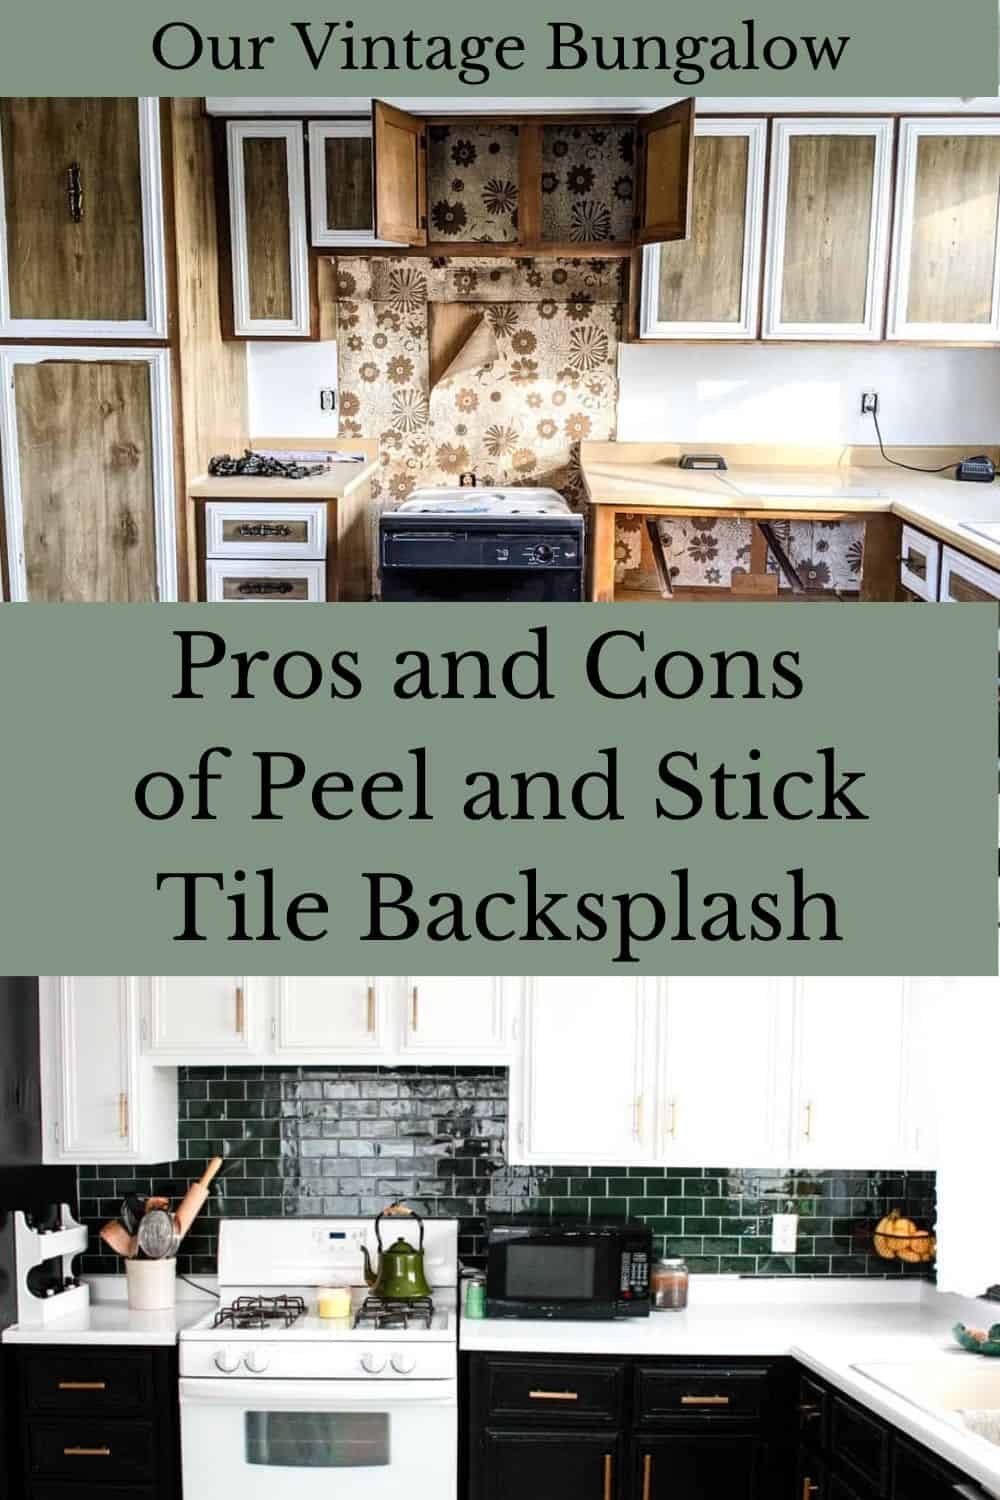
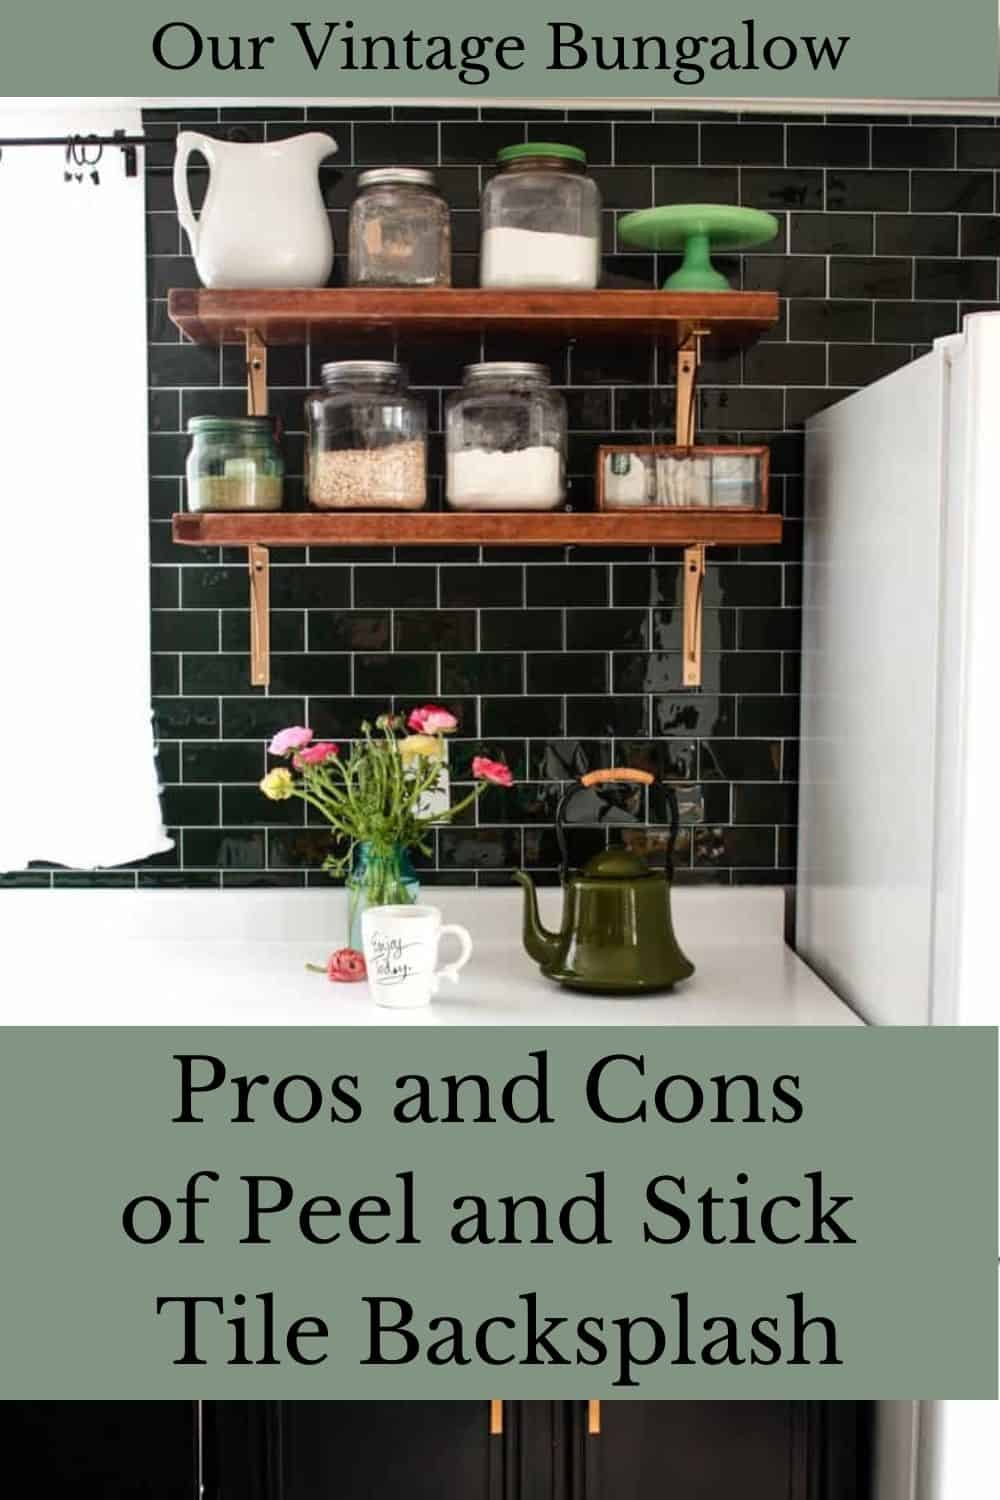
Pros and Cons of Peel and Stick Tile Backsplash
Pros of Sticky Tile
- Quicker than installing actual tiles
- Perfect for a kitchen makeover on a budget (compared to the cost of real tiles)
- Little mess and special tools needed for installing the backsplash tiles, so it’s easy to work on a little at a time
- Easier than installing traditional tiles
- Fun way to try bold tile backsplash without long term commitment
- Temporary kitchen makeover (removing without damage to wall should be tested in your particular situation as it can vary)
- Easy to remove
Cons of Sticky Tile
- It’s temporary. If this was my dream kitchen. I would not use sticky vinyl tile. It’s not going to last forever. With that said, I will be happy if the stickiness lasts for 3 – 4 years. We’ll see.
- It’s not as high quality as regular tile. That goes without saying, right?
- I don’t like the gel feeling surface. Not all stick backsplashes will have this, but mine does. The dirt sticks a little worse.
- There are some areas I’ve had to apply adhesive to to re-stick.
Keep reading for an in-depth look at our peel and stick kitchen tile backsplash process and how it’s holding up one year later!
Why I Chose Peel and Stick Tile Backsplash
Last year we bought a fixer upper farmhouse. While working on our farmhouse renovation, we are living in a 1970’s mobile home on the property. We lovingly named our mobile home Bertha.
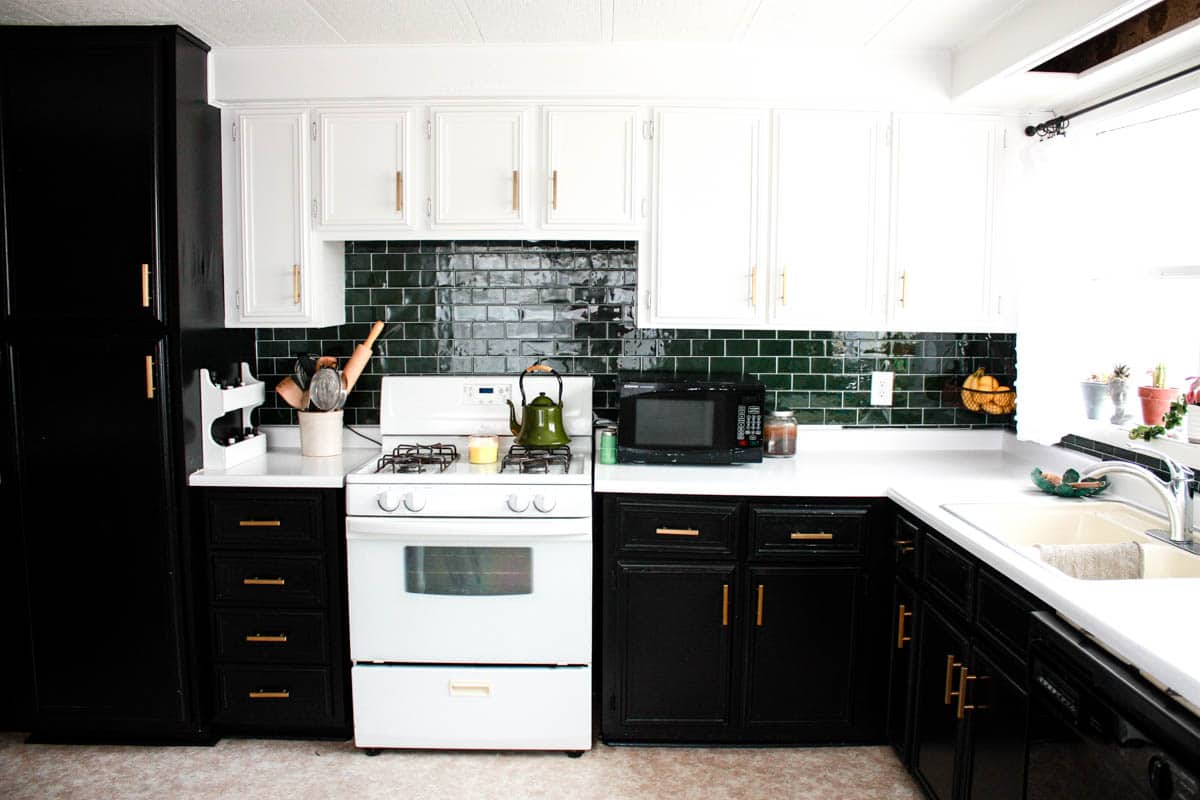
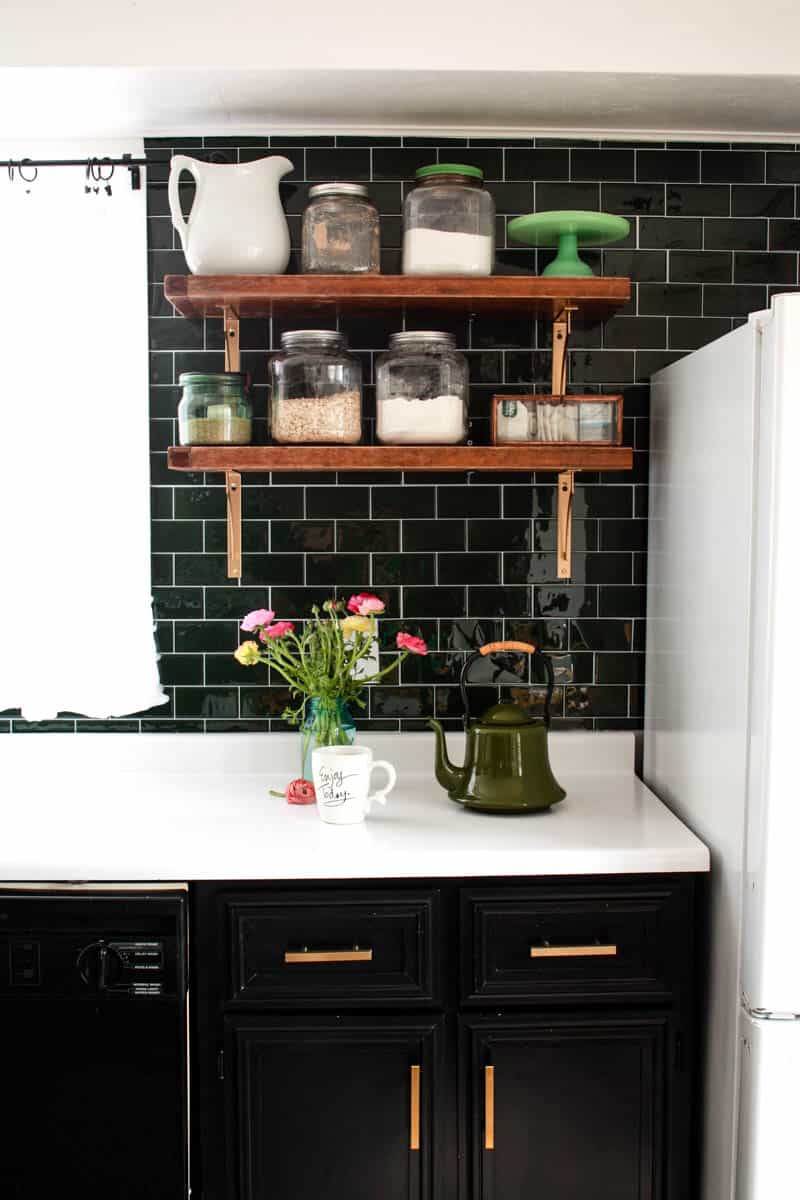
Poor Bertha was in desperate need of a mobile home makeover before we moved in. (See the amazing before and after photos of our kitchen, living room and overall space!) Since it is a temporary house, we needed a mobile home remodel on a budget. The kitchen was straight from the 1970’s, but the big, beautiful, bright kitchen windows let tons of sunlight in. The plentiful sunlight allowed me to choose black kitchen cabinets. The kitchen backsplash needed something bold as well to tie into these dark kitchen cabinets.
Painted kitchen backsplash was not a big enough impact, and traditional ceramic tiles were too expensive and time consuming for what we needed. Enter peel and stick backsplash tile, aka sticky tile.
Where I Purchased Sticky Tile
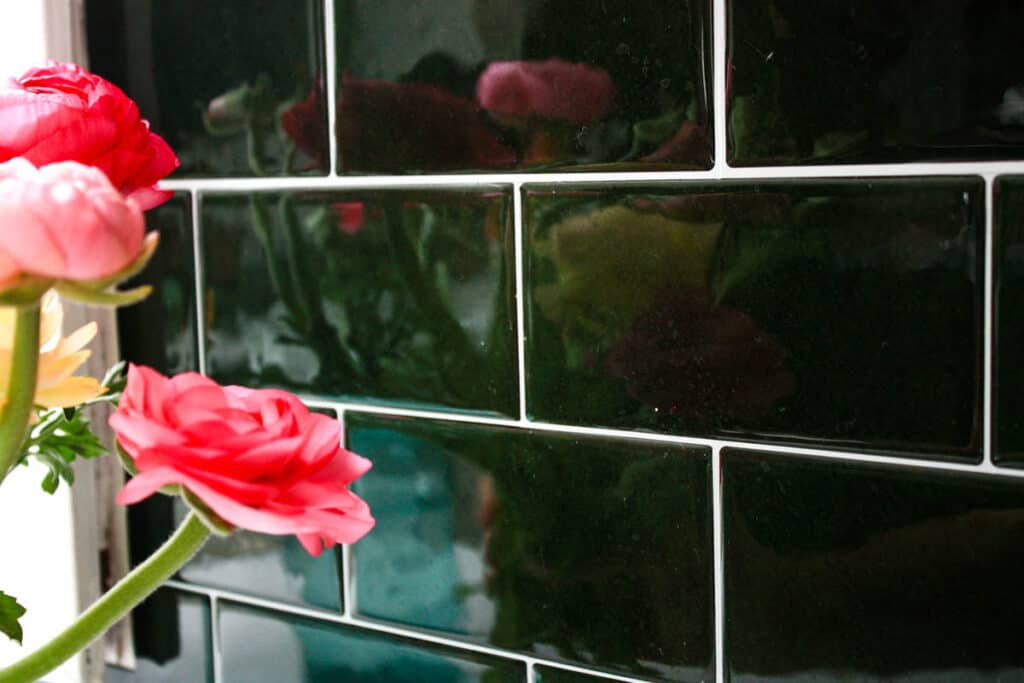
Apparently, peel and stick tile is a popular choice lately because if you Google it, you will find gobs of results. I found mine on Amazon because I stumbled upon dark green tiles. (You can find the tiles I used HERE.) For years I’ve adored dark green tile backsplash. But it seemed like a bold commitment for real tile, and it didn’t fit with my former farmhouse kitchen style.
But for a temporary kitchen makeover (with my bold, black kitchen cabinets), dark green tiles were the PERFECT solution. This post about the pros and cons of peel and stick tile backsplash is based solely on my experience with this one peel and stick option. You will have to test your own peel and stick tile choice for your most accurate results.

Cost Comparison: Peel and Stick Tile vs Ceramic Tile
Before you purchase, MEASURE your space and order all the tiles plus a couple extra packages AT THE SAME TIME. I didn’t do this at all and had to find another company to buy them from when the first company sold out of stock mid-project. Also, I received a package that was not the same shade of green tile. It is a good idea to look at allllllll your packages right away to make sure they all match!!!! You will save yourself a couple heart attacks, trust me.
- Peel and Stick Tile – I purchased five packages containing 10 sheets of 12 inch x 10 inch tile squares, a total of 38.25 square feet coverage. Total cost = $195 (+ tax).
- Green Ceramic Tile – Same amount of dark green subway tile at Lowes. Total Cost = $819 (plus supplies like grout, adhesive, tools)
- White Ceramic Tile – Same amount of white subway tile at Lowes. Total Cost = $55 (plus supplies like grout, adhesive, tile cutter, tools)
Admittedly, the cost of the white subway tile is cheaper, but don’t forget the cost of all the extra supplies you need, such as grout and tile spacers!
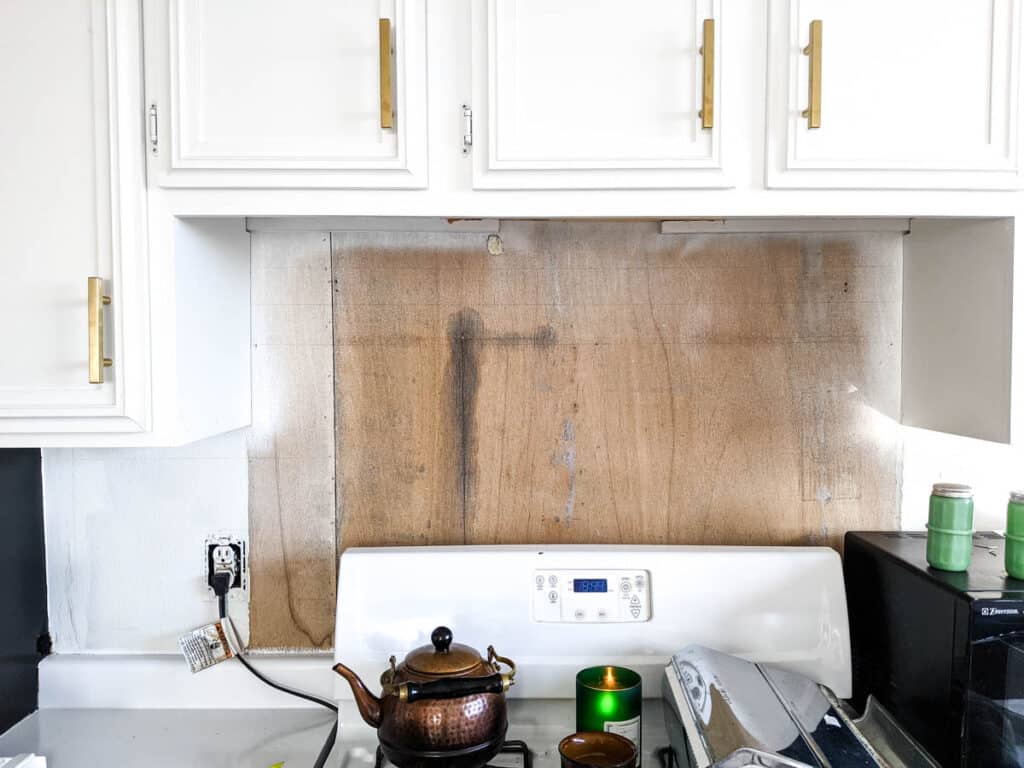
Preparation for Installing Peel and Stick Tile Backsplash
I skimped on the “cleaning” part and thought a quick wipe down of the wall would do. Lesson: CLEAN your surface VERY WELL before applying sticky tile. The wall I quickly wiped down was the only wall I had issues with the stick tile backsplashes not staying stuck. (Read more below on how I fixed the peeling sticky tile.)
To prepare the surface, I would definitely scrub the dickens out of it. My professional cabinet painter sister swears by Krud Kutter for tackling kitchen grease before kitchen makeovers. Let dry completely, obviously.
- Surfaces you can apply sticky tile to.
- Clean, non-porous surfaces, so not brick or cement. I applied on painted and unpainted wood. I believe you would be able to apply over other old tile. This tile is thick, so small blemishes will be covered, but any medium large bumps will show through.
- Tools and supplies you will need for installing sticky tile backsplash:
- Peel and Stick Tile
- Sharp scissors
- Utility knife
- Level
- Pencil
- Small paint roller (optional)
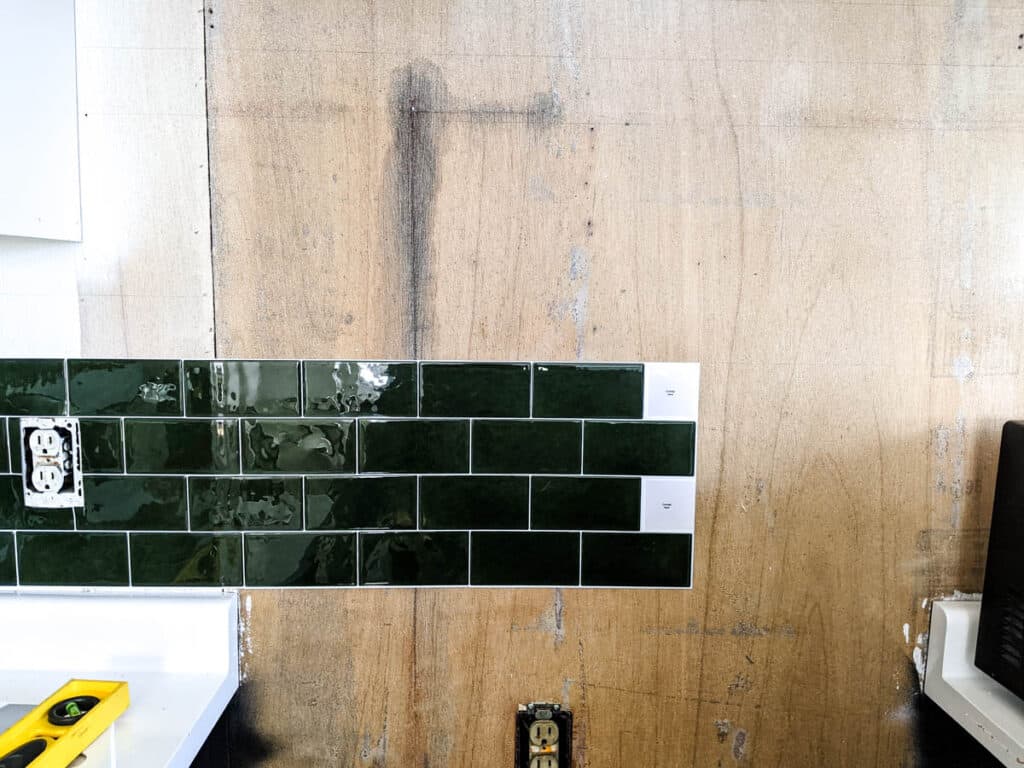
Installing Peel and Stick Tile Backsplash in the Kitchen
- Start at the bottom and work up.
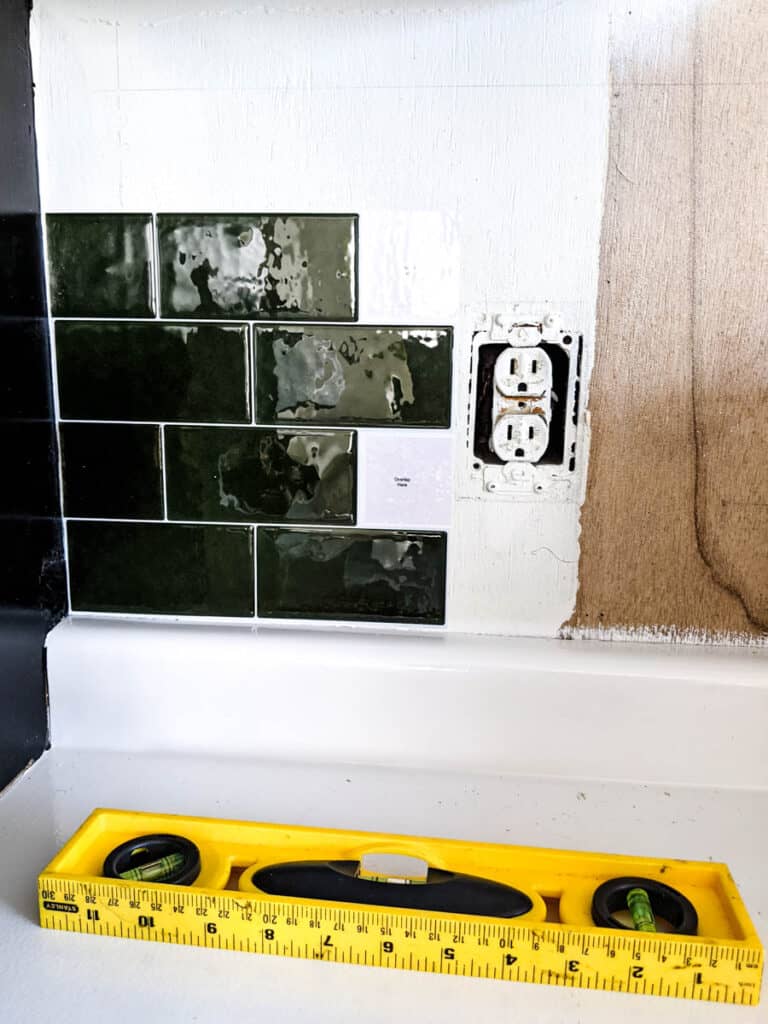
- Use a level and pencil to draw straight edge guidelines. Your counter may not be straight; your cabinets may not be straight. As best as possible, make your tile straight. You can cover small gaps due to crooked counters/cabinets with caulk later. If anything, this is the part that will drive you insane if things in your kitchen aren’t straight.
- For straight cuts on the edges use scissors to cut unpeeled sticky tile.
- Around outlets, remove the outlet covers. Line up unpeeled tile over the outlet hole, and make slight holes with a utility knife in each corner of the outlet hole. Place unpeeled tile on junk piece of wood and cut out the square with utility knife.
- Peel the back off the tile and apply according to your pencil lines. Try your darndest to do it correctly the first time since each time you reposition you lose some stickiness.
- Roll with dry paint roller to firmly stick it down. Or use your hands to smooth firmly.
- Caulk edges between tile and countertop or tile and cabinets when finished.
Ease of Installing Sticky Tile Backsplash
I have done my fair share of real tile work on a kitchen backsplash and entire 9 foot bathroom walls. (See our floor to ceiling tiled Craftsman Bungalow Bathroom Remodel HERE.) Compared to real tile, peel and stick tile is much easier, quicker and far less messy.
That said, I would not describe installing peel and stick subway tile as easy. It takes patience and attention to detail for sure. I worked on it an hour or two at a time for about 4 weekends. So approximately 5 – 6 hours went into our mobile home kitchen backsplash.
Yes, if you make a mistake, you can lift up and re-stick. However, the more you do this, the more it loses its stick. So carefully applying the sheet the first (or maybe the second) time is highly advisable.
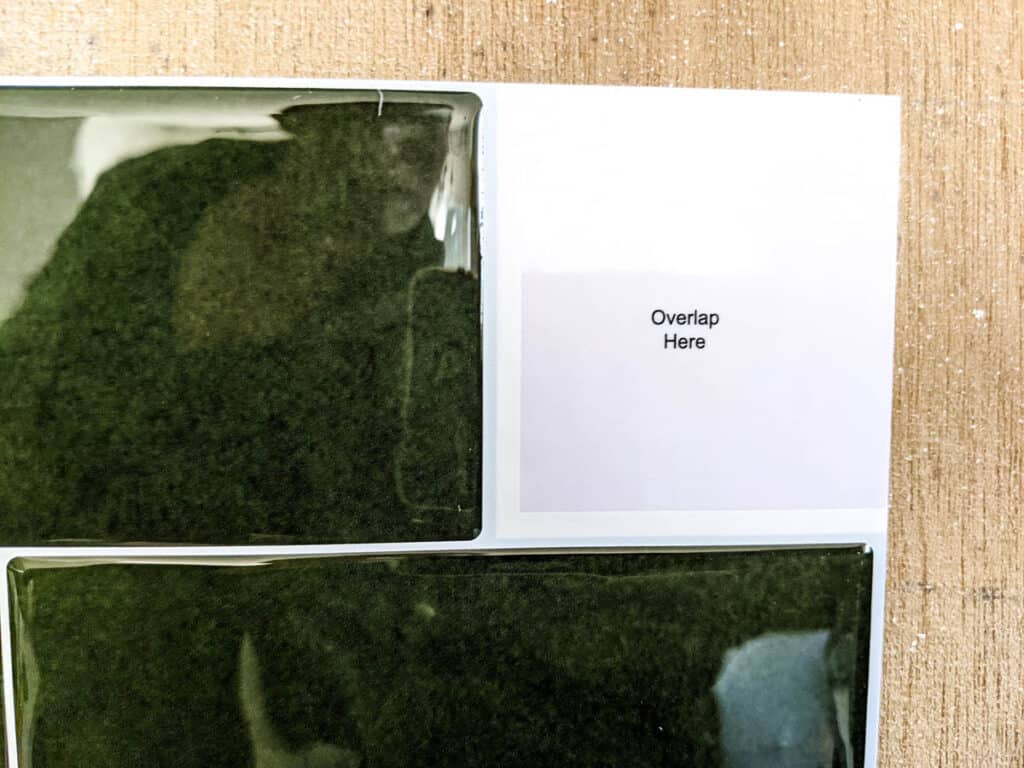
I bought sticky tile that is “3-D,” so the texture is like real subway tiles. It comes in 12 inch square sheets in a pack of 10. Therefore, you are not applying individual tiles but a square foot sheet of tiles.
Living with Sticky Tile Backsplash
I have lived with the sticky tile in my kitchen four months (as of this January, 2023 update, it has been one year of living with these self-adhesive tiles). Everything detailed below is true after one year. So far, it has remained stuck in most places. As I said before, I didn’t sufficiently clean the surface behind the stove before applying the peel and stick wall tiles, so it did come up in several different places in a 2 x 3 foot section. Overall though, it is standing the test of time!
-
Fixing sticky tile that comes unstuck:
- I purchased wallpaper adhesive seam repair and ran thin lines of adhesive under the areas that were coming up. Adhesive did squeeze out a little when I pressed down, but I immediately wiped it with a wet rag with no problem. So far, the adhesive has held down the tiles that have come unstuck.
-
Does it smell?
- In my experience, no, it did NOT have any “vinyl” or fake smell. Personally, I am extremely sensitive to fake smells from candles and perfume (they give me an instant headache). But I am not extremely sensitive to remodel-type smells from paint, mold, etc.
-
Can you clean self-adhesive wall tile?
- The self-adhesive wall tile that I bought is gel, so it has a “gel” feeling, meaning it is not slick but “grabs” when I wipe it down. This is probably not true for all sticky tile choices, but it is for mine. It is very cleanable, but I have to make sure the rag is pretty wet.
- I do have to “polish” the tile with a dry cloth to make it shiny again, but this is no different than the real tile backsplash maintenance in my former farmhouse style kitchen.
-
Can you use sticky tile behind the stove?
- Yes, I have not had a problem with the sticky tile as far as it being behind a hot and humid stove. (We have no oven vent.) The manufacturer description said it was designed for behind stoves, so I would make sure the peel and stick tile backsplash you choose specifically says it is heat resistant.
-
Can you use sticky tile behind the sink?
- I just have a three inch space of sticky tile behind the sink. It regularly gets sprayed and wiped down with water but not soaked. I have had no problems with the tile coming loose behind the sink, even after one year of regularly getting wet. (Do know that this is not designed for areas that are regularly soaked with water like showers.)
-
Is sticky tile easy to remove?
- YES!!! I have removed it from painted wood, other vinyl tile and bare wood. It has easily removed and left no sticky residue. It did NOT remove the paint. Again, this is my experience. I would strongly suggest testing an inconspicuous place on your surface before committing if you absolutely need to remove it in the future like in a rental kitchen makeover.
Would I Install Vinyl Peel and Stick Tile Again?
Yes. Most definitely yes because it suited my needs for a mobile home makeover on a budget. I love the look of the dark green tile backsplash, and this is something I would have never tried with permanent tiles.
So there are my pros and cons of peel and stick tile backsplash for our mobile home kitchen, aka Bertha.
Comment below if you would ever consider using sticky tile in your home and why or why not!
Shop the Look
Dark Green Peel and Stick Tile Backsplash
Vintage Style White Ironstone Pitcher
Glass and Metal Tea Bag Storage Box
Read more about our single wide mobile home renovation here
Pros and Cons of Peel and Stick Wallpaper (from a beginner)
How to Decorate a Mobile Home Living Room
Mobile Home Mid Century Style Kitchen Makeover Before and After
DIY Mobile Home Remodeling Ideas
How Much Does a 10 x 10 Kitchen Remodel Cost?
Storage Ideas for a Small Home
How to be Content Living in an Ugly House
DIY Home Renovating with Young Kids
Pin for later Pros and Cons of Peel and Stick Tile Backsplash


7 Responses
I realize this is about the tile install, but I was wondering how the counter top paint is doing? I own a mobile, single wide which I inherited. I am painting kitchen cabinets, lighter gray/beige , but counter tip is variegated brown and the floors are gray vinyl wood look . Can’t change floors, fairly new. Would like to paint counter if feasible then do the stick in tile backsplash. Feedback from counter top?
We are three years of heavy use of our countertops, and they are still going strong. There is some small pitting (tiny chips) in some of the heaviest places, but overall, the paint has held up great. Since it’s white, it does stain a bit (things like coffee and tomato products), but I simply spray Clorox on every once in a while, and it takes all the stains right out. Read more of my experience here https://ourvintagebungalow.com/pros-and-cons-of-painting-kitchen-laminate-countertops/
I appreciate all your common sense, but easy to miss suggestions. I didn’t see anything about how you created an end/edge if a wall doesn’t end in a wall or cabinet? Also wondering if you used grout? I haven’t see the tiles “IRL” so this may be a stupid question! Thanks for your detail!
I’m so glad this was helpful to you! Thank you for your perspective and question in asking when the tile doesn’t end in a wall. I hadn’t thought about that since mine does end that way! I will update the post to include this, but to quickly answer you, I would cut the “tile” very straight and just leave it a raw edge or put a very thin piece of trim around the 90 degree angle. This is much like how regular tile would be finished out.
And not a stupid question at all. There’s no grout required. The “tile” comes in complete 12 inch square sheets that you stick to the wall. The “grout” is already there on the sheet.
I just ordered mine and can’t wait to see the diffrence in my mobile home kitchen.Thanks so much for the info.
I’ve been wondering these things for awhile now, so thank you so much for answering all my questions! We are moving into a rented apartment, where we won’t be able to do much to physically change the walls, etc. So sticky tile sounds like it will be a great way for us to personalize our space.
I have been thinking about doing this in our kitchen…we are mid remodel and only have a small section that needs a true back splash. Thank you for your detailed instructions and review. I absolutely love the dark green tile brought all the way up to the ceiling in your kitchen!