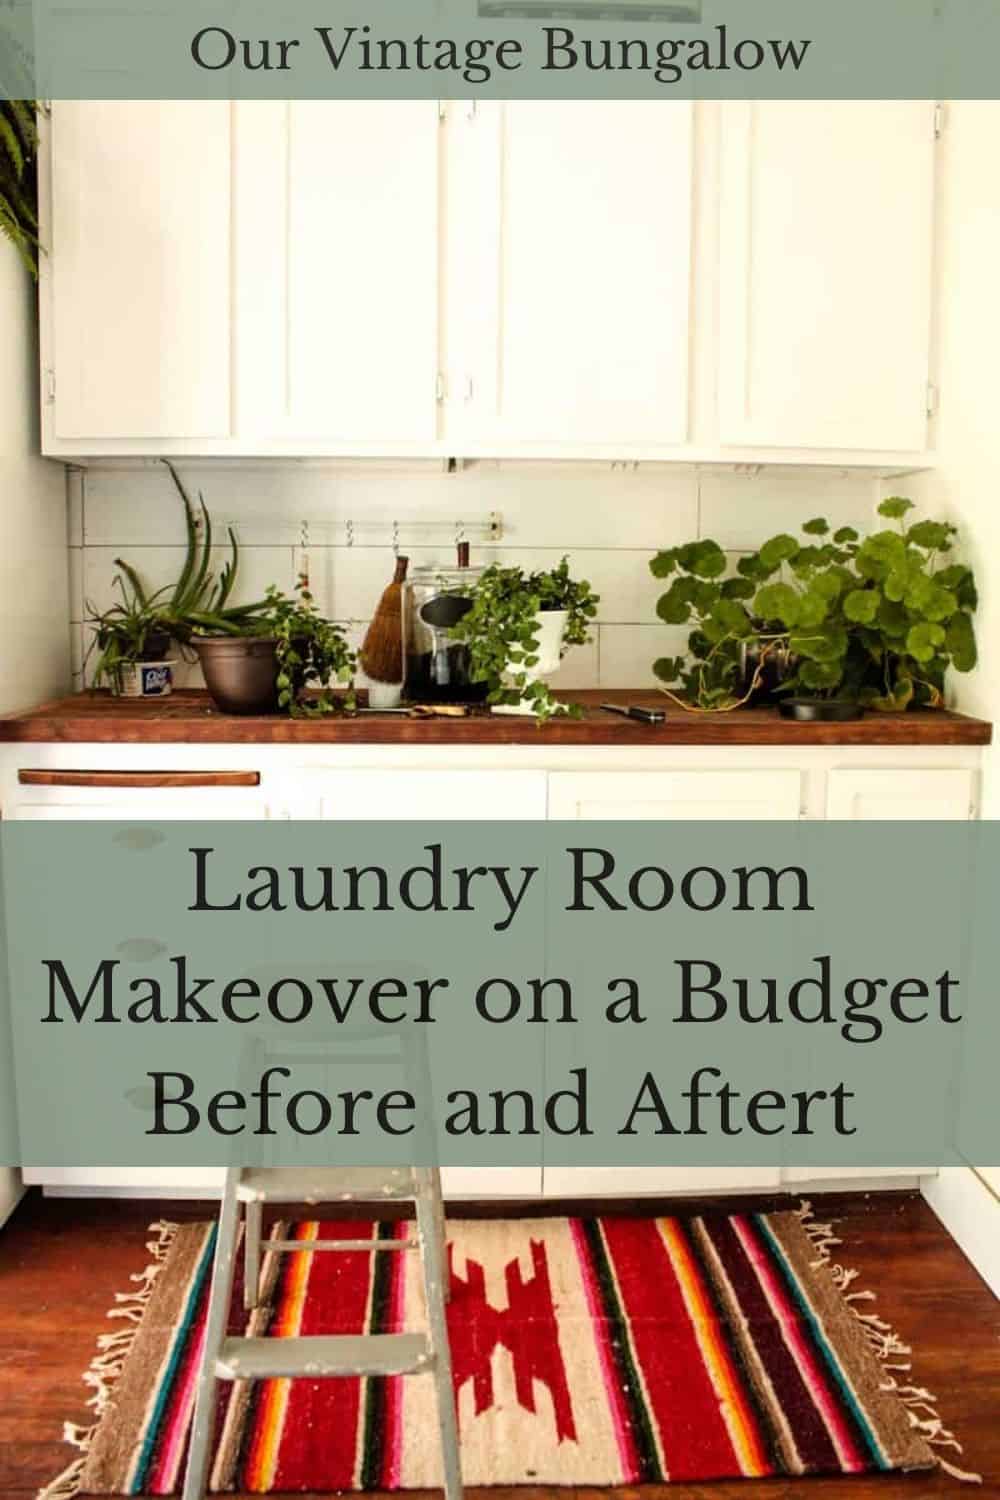
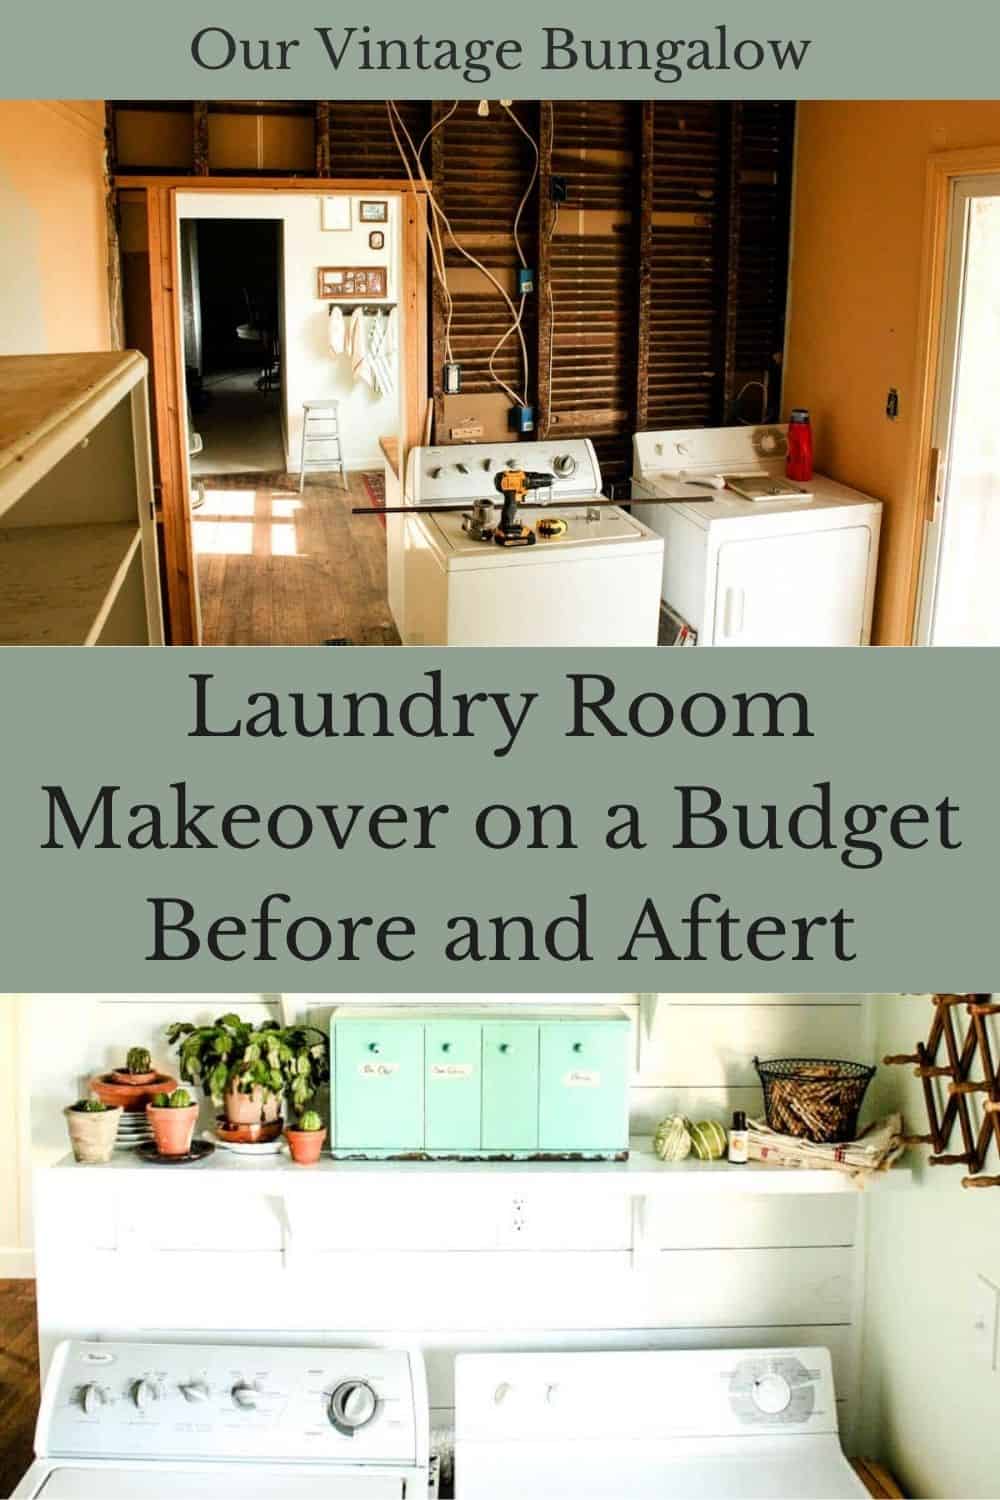
Our farmhouse laundry room was the handiest room in our previous home, a 1900’s bungalow remodel. It was a beautifully bright room, but the mustard yellow walls made me want to stay far, far away. We had just finished the kitchen remodel, so funds were tight. Let me show you our vintage laundry room makeover on a budget before and after.

As an Amazon Associate, I may earn a small commission through your purchase through any Amazon affiliate links on this post. This is at no additional cost to you. All recommendations are my own because I believe in each product. See my full Privacy Policy here.
While renovating the kitchen, I had the grand idea of extending it into the laundry area. But Caleb starting saying things like “supporting walls” and “no way I’m doing that.” I still don’t see the big deal. In the end, I was glad my idea didn’t take off because we ended up with a large laundry room and butler’s pantry that was a great open space just off the kitchen.
The entire room was a complete overhaul, but this was by far the simplest and limited budget diy project we’ve done. My dad helped with electrical and sheetrock. And Caleb had to come and fix a couple of my mistakes, but the rest (even hanging those doggone cabinets), I did myself. Is it perfect? Nope. I’m not a detail person, unfortunately. Some of my work drives Caleb nuts because he IS a detail person. But he was gone, so I got ‘er done. And, in my book, that counts…
(…except for when an entire shelf holding laundry supplies and home canned goods falls down because you didn’t hang it right. Then the get ‘er done attitude could have used a little detail.)
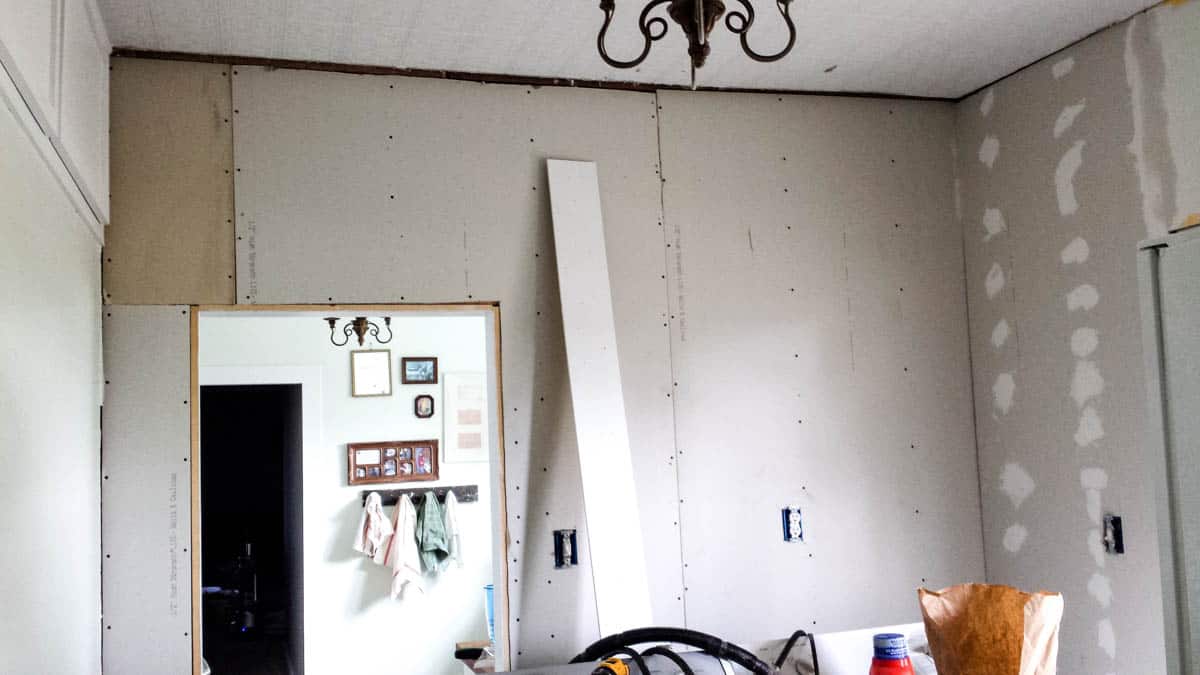
Before the Budget Friendly Laundry Room Makeover
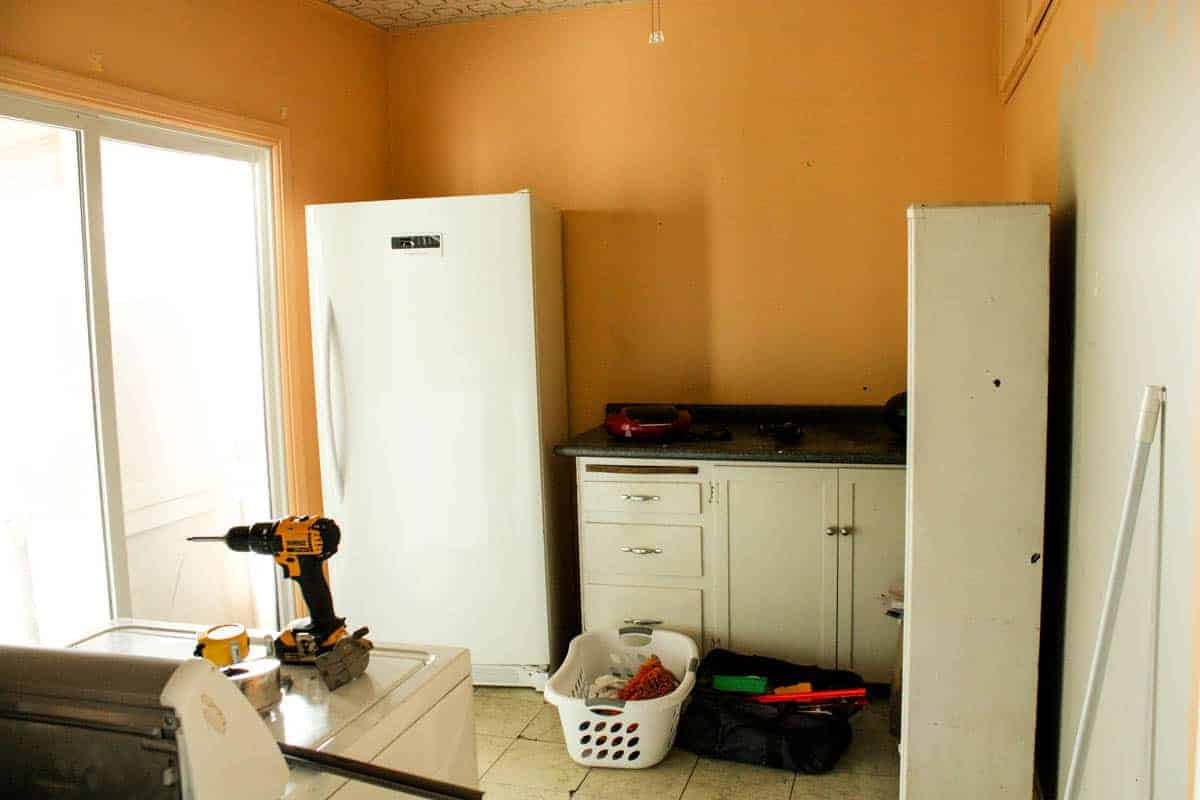
As I said, the walls were mustard yellow. I respect the former owner’s choice of paint color, but that doesn’t mean I liked it. It made a room full of natural light dark and depressing.
There were also no cabinets except a row next to the ceiling that went into the wall. This row was very useful as extra storage for items we rarely used but not for laundry, cleaning or pantry storage. We had moved a cabinet leftover from the kitchen remodel in there as a temporary pantry solution.
The flooring was peel and stick tile. I’m not knocking peel and stick (since I’ve used this option in our mobile home as easy ways to add quick style). But this flooring was not my favorite for our laundry room.
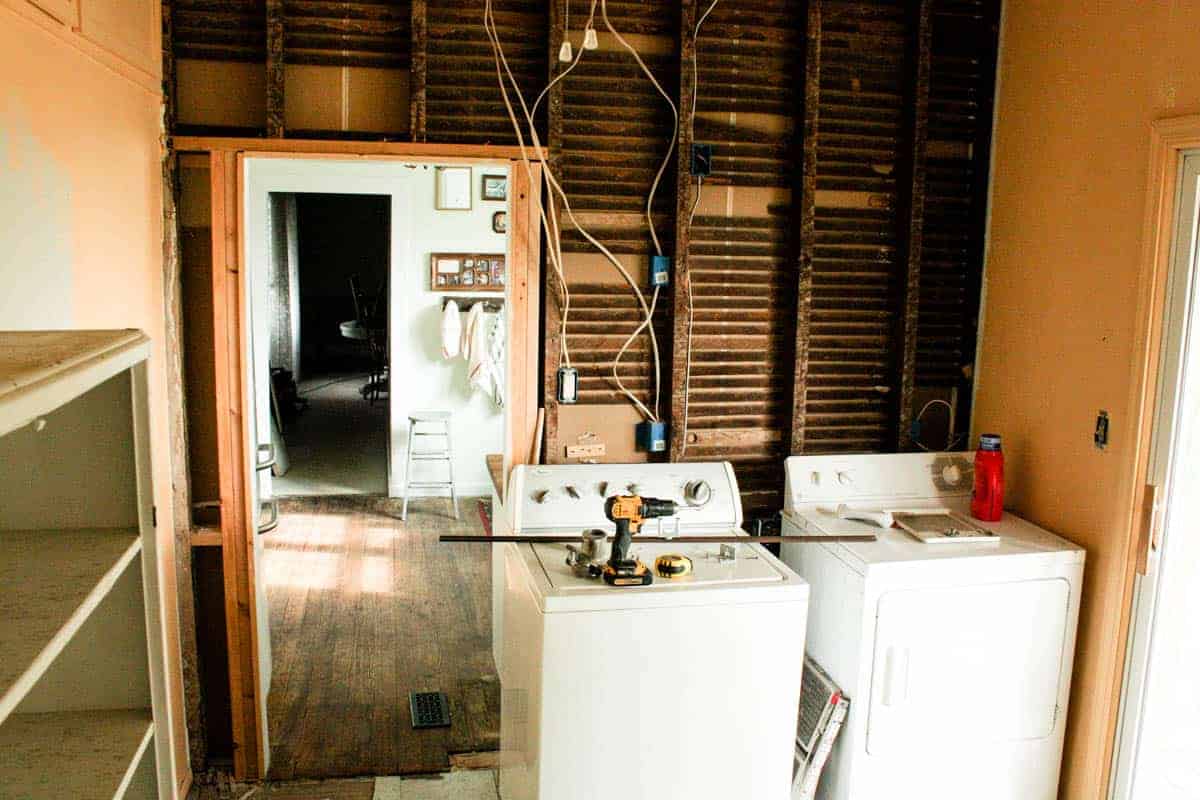
One wall had the lathe and plaster removed without any sheetrock added, so the studs and lathe boards on the other side of the wall were exposed. I don’t know if this was an on-purpose design decision from previous owners, but it made the room even darker and unfinished feeling.
What We Replaced or Added to the Laundry Room
Thankfully, we didn’t have to tear out much in this room. We added:
- Some sheetrock and shiplap
- Electrical updates
- Cleaning closet
- Cabinets, open shelving and countertops
- Fresh coat of paint on everything
- New lighting
Style of the Laundry Room Remodel
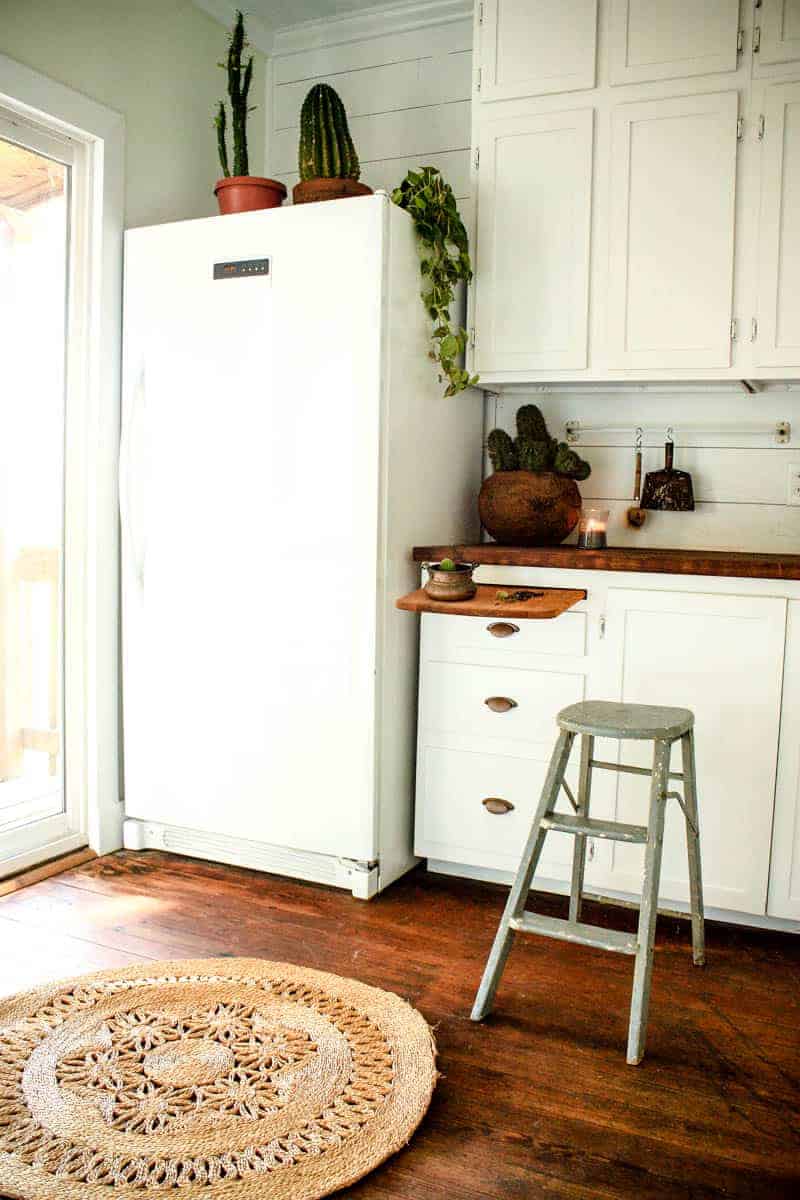
Since we had a Farmhouse style in the adjoining kitchen, I decided to keep things mostly the same in the laundry room. I kept the same trim and cabinet color, wall color and flooring. The chandelier was the same as in the kitchen. The farmhouse combination of white cabinets and butcher block countertops were a great contrast. We decided not to add a laundry room door since there was no place for it to swing open.
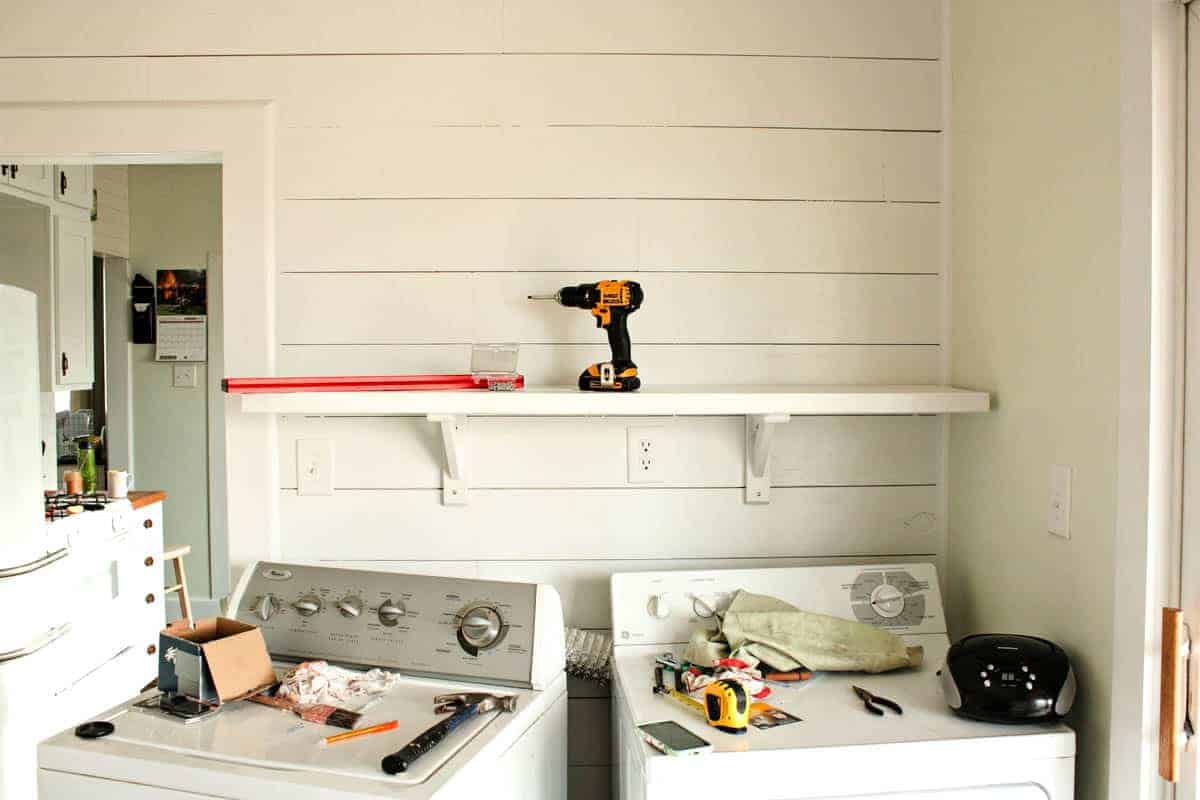
I used shiplap on the walls instead of tile like the kitchen. This was to keep the laundry room more casual and was also a more budget friendly option.

Cost of Sheetrock, Paint, Trim and Shiplap Walls
We added sheetrock to the wall missing it, but all other walls were fine.
For the shiplap walls, we simply purchased a couple 4 x 8 sheets of plywood at Lowes and had them cut it in 6 inch strips. Did you know Lowes and Home Depot will do this for you? They will charge a small cutting fee, but it is so easy and worth it!
We found some crown molding trim at a local building surplus store. Since we didn’t need much, it was easy to find a couple matching strips.
Wall paint was leftover paint from the kitchen walls. (I added a full gallon to the cost.) It is Spinach White from Sherwin Williams and is a barely green color. I love it for the slight color it adds so it makes the room more unique than all-white.
Trim, cabinet, shiplap and ceiling paint color was all the same. I chose Atmosphere from Glidden for a slightly cool white. It’s one of my favorite whites for a trim that goes with a lot of colors.
Cost Breakdown for Walls
- Sheetrock – $20
- Plywood for shiplap walls – $135
- Trim from building surplus store – $17
- Atmosphere by Glidden paint for walls – $50
- Spinach White by Sherwin Williams paint for trim – $50
Total for Walls = $272

Cost of Butler’s Pantry Cabinets
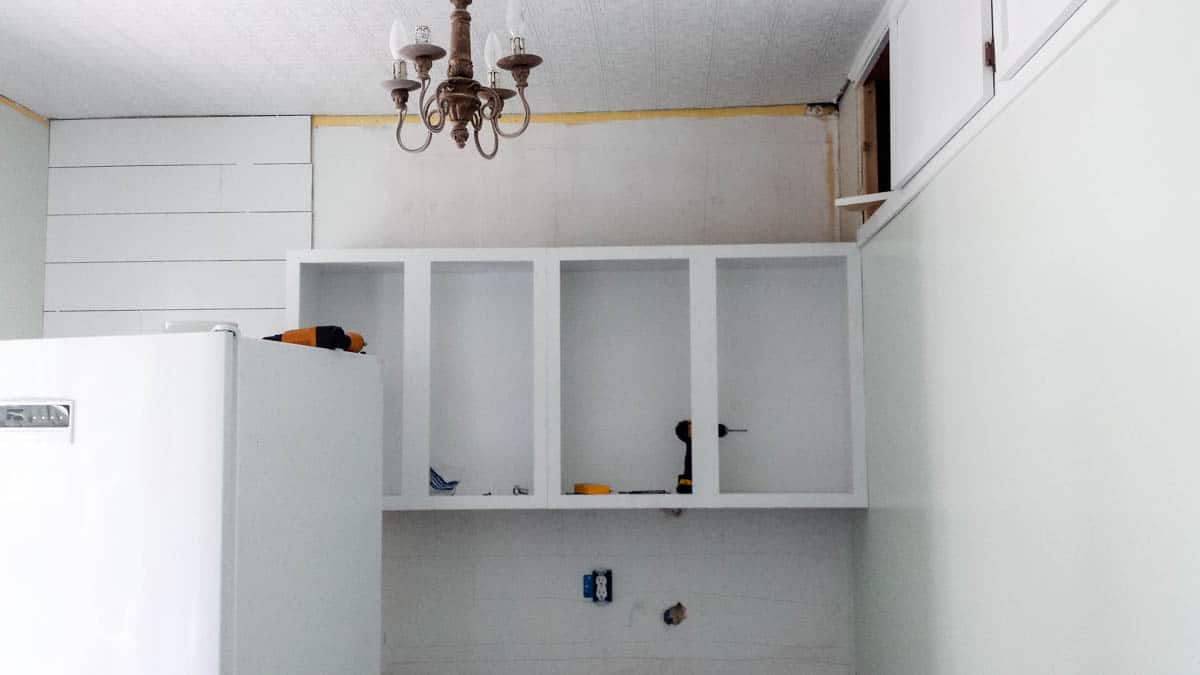
We did full on repurposing for this category. As I said, we just came off of our kitchen remodel and needed to do a tight budget laundry room remodel. The upper and lower cabinets we had removed from the kitchen since they didn’t work with the new kitchen layout.
This is where it gets a little hard to explain, but stay with me. For the butler’s pantry wall of cabinets, we repurposed the old cabinets from the kitchen remodel. I used two cabinets for the first row of uppers This left a significant gap above the cabinets that I did not want to waste.
One of the remaining upper cabinets from the kitchen fit on its side (horizontally) between the ceiling and my first row of cabinets. I purchased another small cabinet from Lowes to fill out the top row of upper cabinets.
Now, all the former kitchen cabinets had no doors. I have no idea what the previous owners did with them, but I had to find something that fit. Thankfully, I found Shaker style doors on Craigslist in a town about an hour away and some at Habitat Restore that matched the lower cabinet doors. We were able to paint them and add hardware. (Habitat Restore is a Goodwill type place for building materials.
But then there was the problem of the cabinet I had purchased from Lowes. The doors were different than the rest. Buuuut, if you turned them inside out, they matched! We filled in previous hardware holes and added new hardware for all-matching cabinet doors. This wall of cabinets put our diy skills to the test, but where there’s a will, there’s a way, right? We gave them all a fresh coat of white paint so that even the parts that didn’t match blended right in.
Cost Breakdown of Butler’s Pantry Wall of Cabinets
- Lower cabinet (repurposed from kitchen remodel) – $0
- Upper cabinets (repurposed from kitchen remodel) – $0
- One upper cabinet to fill in gap at the top (from Lowes) – $70
- Cabinet doors for all uppers (Craigslist and Habitat Restore) – $52
Total for Cabinets = $122
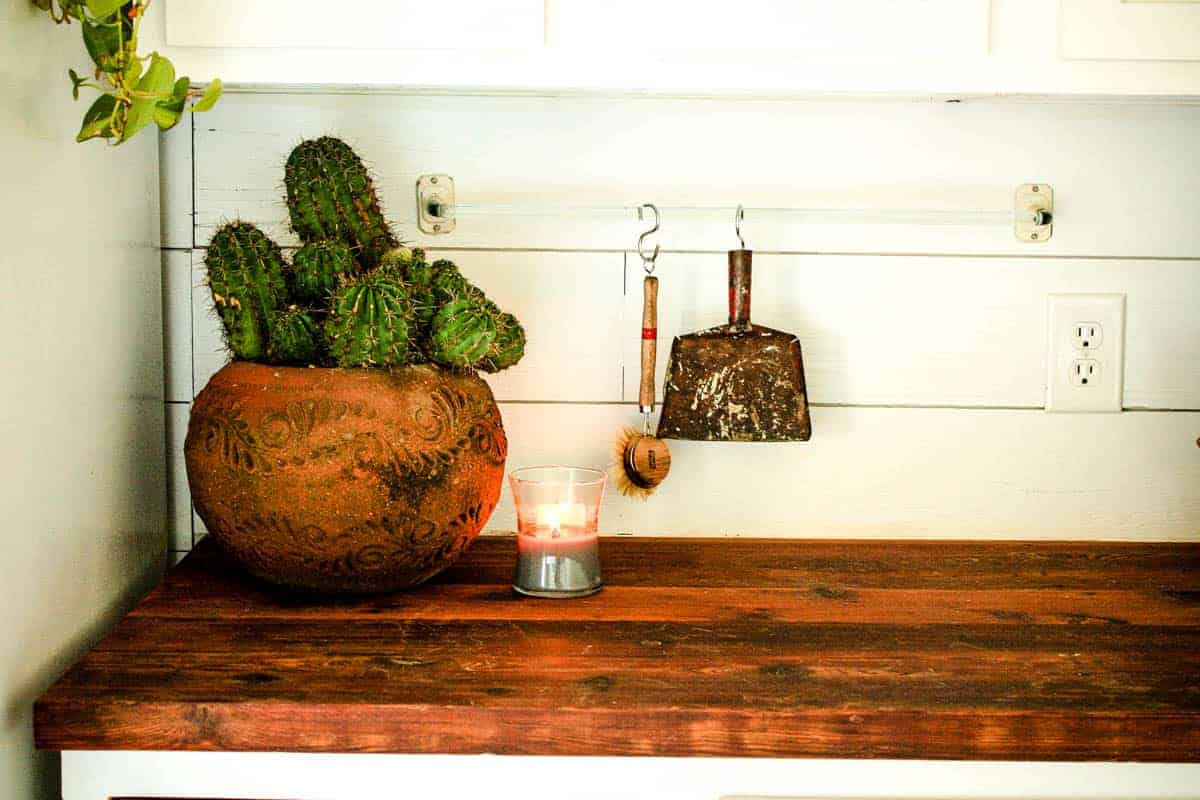
Cost of Countertops
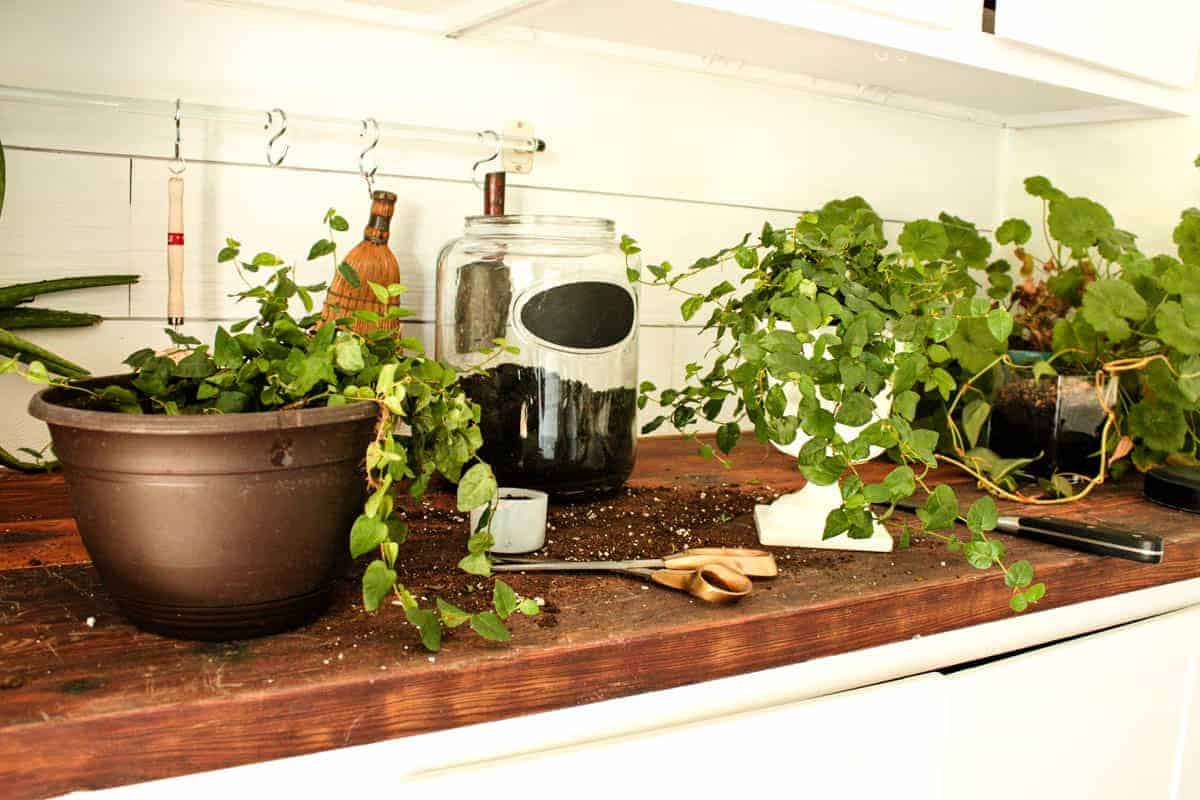
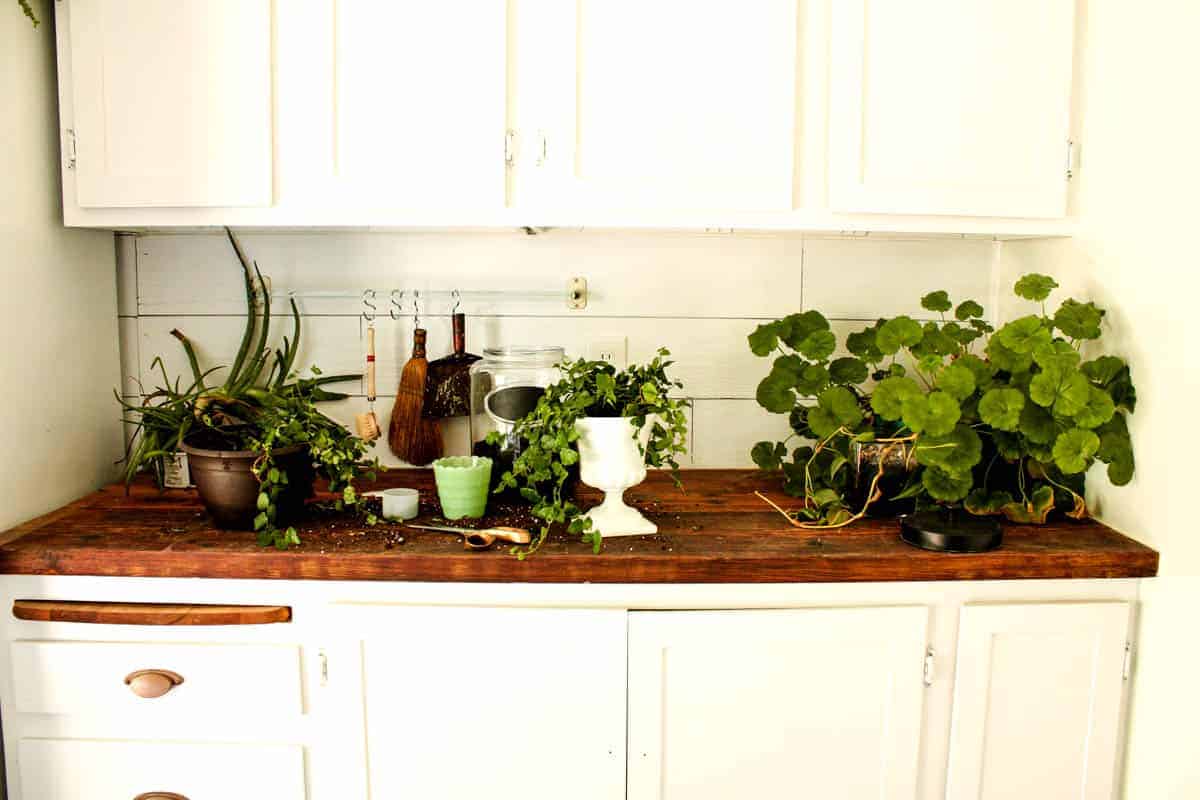
Caleb made the butcher block countertop out of some old wood we scavenged from my parent’s barn. He glued the boards together and sanded it. I finished it out with tung oil purchased for the floors from The Real Milk Paint Company. It became a great spot for a potting bench and a place for my house plants.
Total = $0
Cost of Open Shelving
I wanted huge open shelves above the washer and dryer for laundry supplies and for storing all my thrift store baskets, flower pots and vases and other vintage items I used often. This would allow me to store AND decorate with my vintage items at the same time, making a huge impact on that wall.
Again, we found wood from my parent’s barn; Caleb built shelves; and I painted them the same Atmosphere white as the cabinets. We purchased wood shelving brackets (similar found here).
Cost of open shelves
- Wood – $0
- Shelf brackets similar found HERE – $50
Total = $50

Cost of Cleaning closet
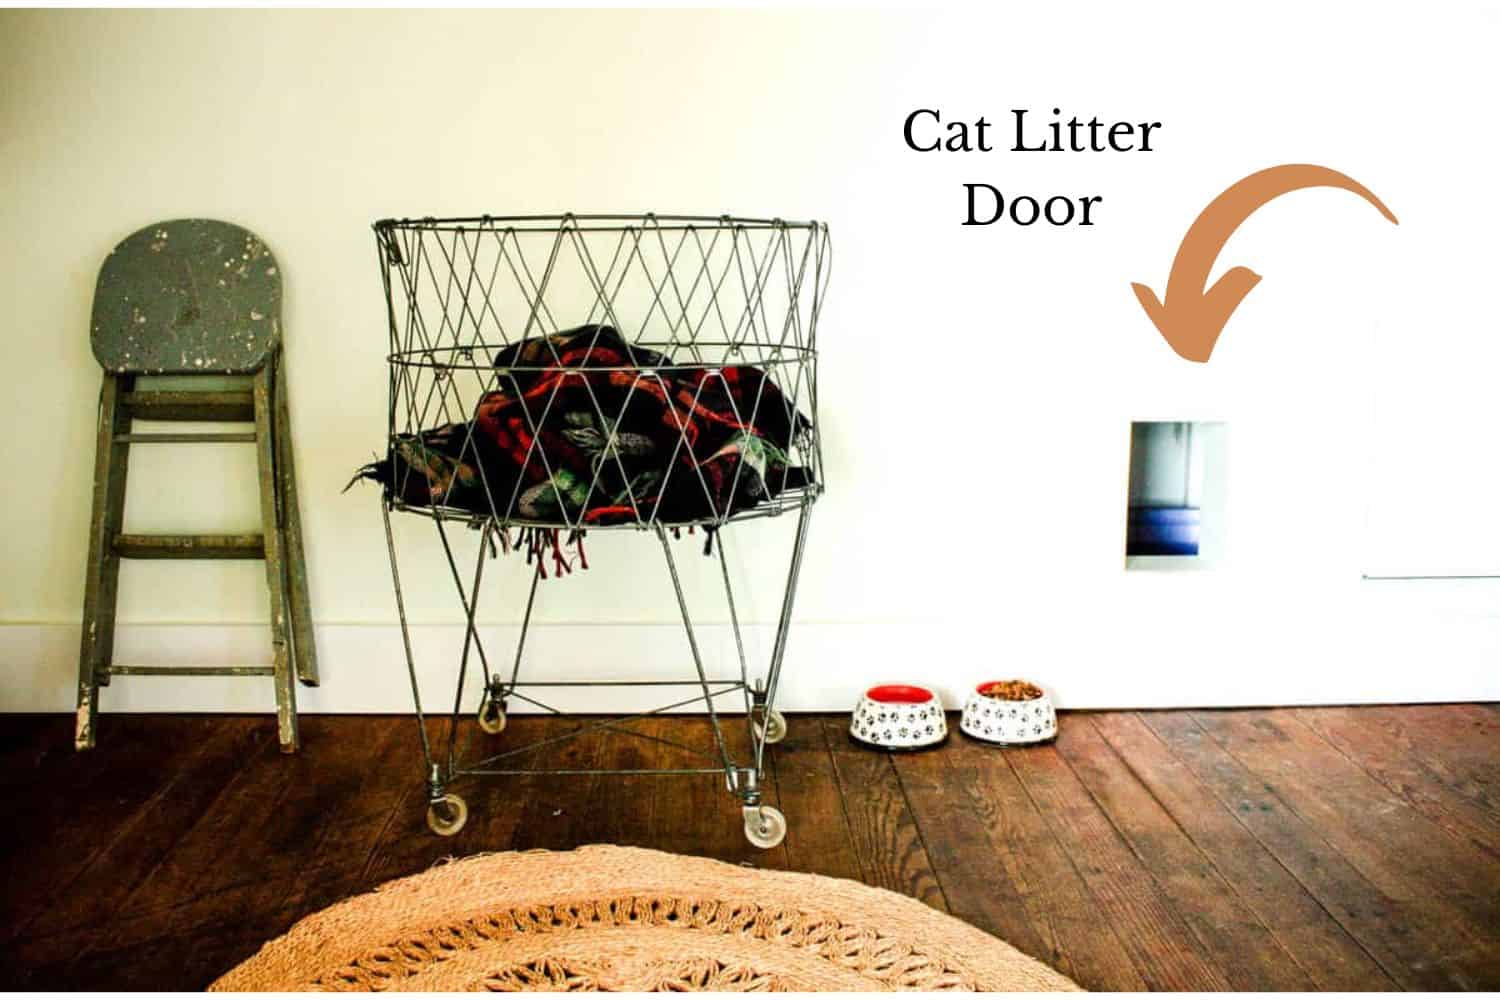
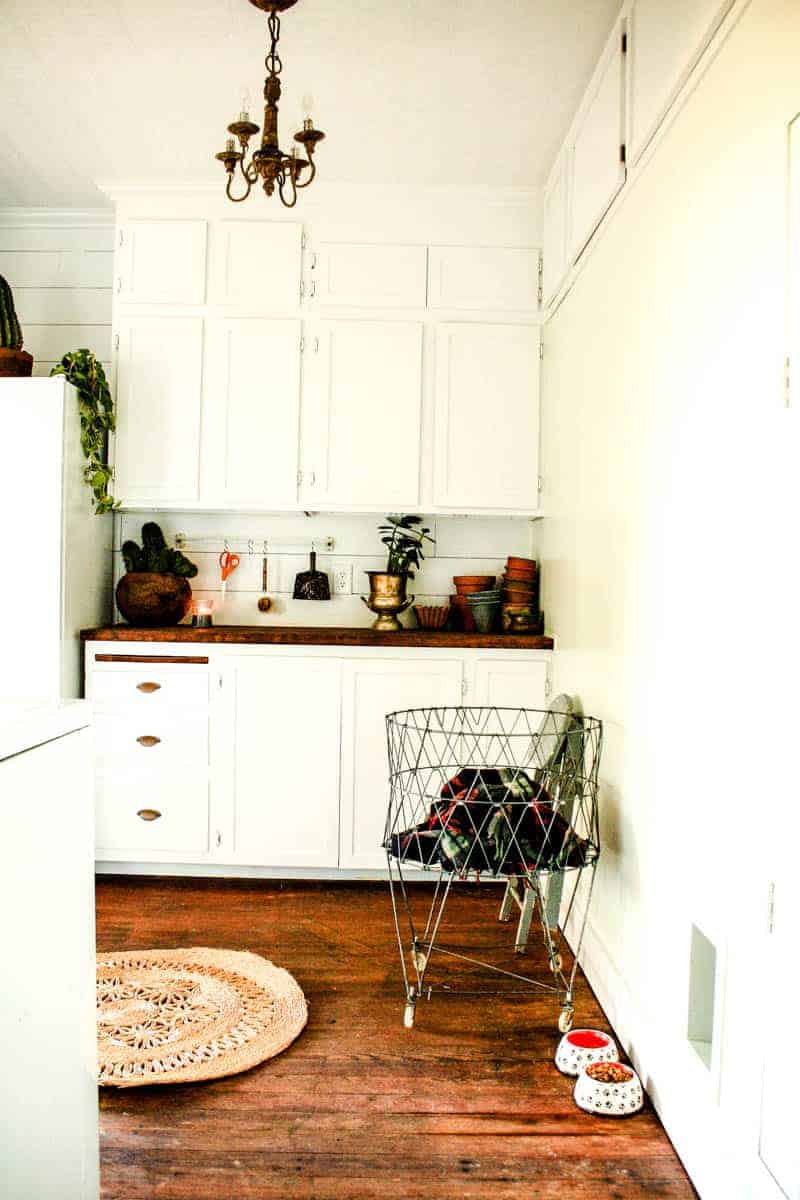
There was no storage space anywhere in the house suitable for our vacuum cleaner and cleaning supplies. The other side of the wall was the nursery (guestroom) closet. As I mentioned before storage had already been added at the top with access from the laundry room. We decided to block off part of the closet from the nursery side and add a door on the laundry room side.
In this new cleaning closet in the laundry room, we added a built in cat litter box. I hate seeing and smelling litter boxes in a room. We built a sheetrocked box inside the closet and cut a hole from the outside. I wish I had taken photos before our move of this addition. The only photos I have are of the cat entry hole in the wall. Just know this went into a partitioned area inside the closet with a lid on top for cleaning access.
Cost breakdown for cleaning closet
- Sheetrock – $30
- Hardware and trim – $23
- Shelving – $88
Total = $141
Cost of Flooring
Thankfully, we found the original wood floors under several layers of linoleum and plywood. I simply had to scrub them with soap and water. We chose to finish them with a natural Tung oil we had used in the kitchen. I guess the flooring was a different wood because it made it a different color than the kitchen, but I guess that’s the unique beauty of old houses.
Cost breakdown of flooring
Total for floors = $25
Cost of Electrical and Light Fixture
Thankfully, my dad does our electrical work, so I know this saves us a lot of money. There were just a few things that needed to be changed like adding outlets to some areas.
I purchased the same chandelier as the kitchen. It was in the same location as the other light, so it was a simple switch out that I did myself.
Cost breakdown of Electrical and Lighting
- Electrical – $40
- Chandelier light found HERE – $215
Total = $255
Total Cost for Laundry Room Makeover on a Budget = $865
Since this was a utilitarian space more than a place to decorate, I made sure all the laundry items were vintage (or vintage style) and beautiful. That way I embraced the authentic farmhouse style by decorating with practical items. My laundry basket and hamper was a rolling laundry cart; I purchased a pretty broom and dustpan to hang on the wall; and a vintage step stool looked simple yet perfectly in place leaning against the wall.
I hope you enjoyed this tour of our laundry room makeover on a budget before and after. I love when we challenge ourselves to do a project or a room remodel on a budget. It gets our creativity flowing and gives a sense of satisfaction looking at a new room with the knowledge that it didn’t take much money.
On top of that, I always try to resell on Facebook Marketplace or Craigslist the items we tear out of a room. This laundry room didn’t have much to sell, but I did manage to make about $30 on the ceiling fan that we took out. Every little bit helps, right?
We made simple changes in an affordable way to gain a beautiful room with lots of farmhouse charm. I hope this laundry room makeover on a budget before and after will make a big difference in your own laundry room!
Comment below and tell me what your favorite budget remodel or project has been!
See more of our before and after renovation projects here.
Bungalow Kitchen Remodel Before and After
Craftsman Bungalow Bathroom Remodel
Mid Century Nursery Before and After
Farmhouse Remodel Before Photos
Pin Laundry Room Makeover on a Budget Before and After for Later.