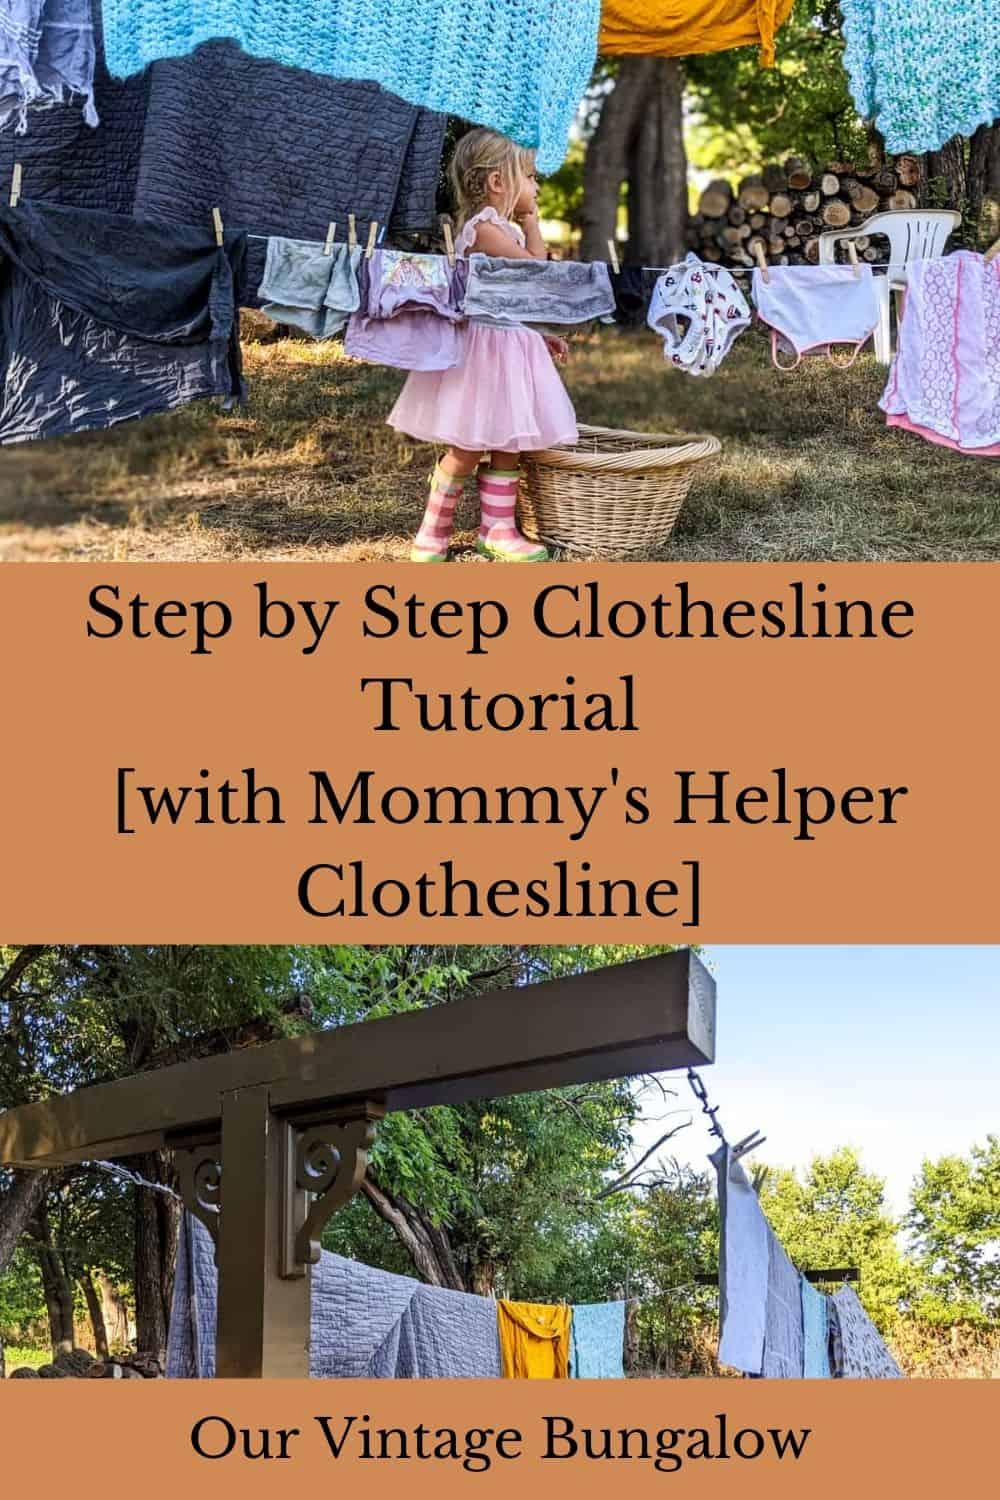
Why read a blog post clothesline tutorial? The differences between this DIY clothesline and other tutorials is that I walk you through customizable options for your situation, each step has real-life photos, and I include a bonus retractable kid’s clothesline attached so your kids can join you in real life! Follow me as I walk through this easy and in depth tutorial for a step by step clothesline tutorial with a bonus mommy’s helper clothesline.
Rising costs have you looking around for ways to cut back on the electric bill. But they must be SIMPLE ways because ain’t nobody got time to add one more thing. I am going to give you an easy tutorial on a step by step clothesline tutorial that can be done in just one weekend. A clothesline is an easy way to save money on energy costs!

As an Amazon Associate, I may earn a small commission through your purchase through any Amazon affiliate links on this post. This is at no additional cost to you. All recommendations are my own because I believe in each product. See my full Privacy Policy here.
Why We Needed To Build a DIY Clothesline
We’re living in our 1970’s mobile home (aka Bertha) in the country while working on the farmhouse renovation. We painted and cleaned to make the ol’ girl purdy (ish). But the fact remains, she is a tin box in the middle of Kansas where summer temperatures easily reach above 100 for days on end. When it’s 70 degrees outside, it’s 85 inside without the air conditioner.
And speaking of the air conditioner, the one we have for our single wide mobile home tin box is also very old. VERY. But the farmhouse renovation and all means we don’t want spend money to replace it. Poor old Bertha’s AC runs constantly and keeps the temperature a little over 80 degrees.
Which is why I don’t want to run the dryer…like EVER. I was desperate for a clothesline to save on inside temperature AND electricity cost. (Did I mention the AC is running constantly?)
So here is my step by step clothesline tutorial [with mommy’s helper clothesline]…brought about by the terrible air conditioning system in Bertha, the single wide mobile home.
Materials Needed
- Three 4 x 4 treated lumber posts 8 feet length
- Two clotheslines with tighteners found HERE (these are for a 20 foot clothesline)
- One retractable clothesline found HERE (this can be up to 49 feet long)
- Two bags of cement
- Two 6 inch lag bolts
- Four pieces of scrap lumber 2 x 2s or 2 x 4s about 4 feet long
- Decorative brackets, optional. Find the ones I used HERE
- Outdoor Paint + Primer
Tools Needed
- Post Hole Digger
- Tape measure
- Miter saw or circular saw
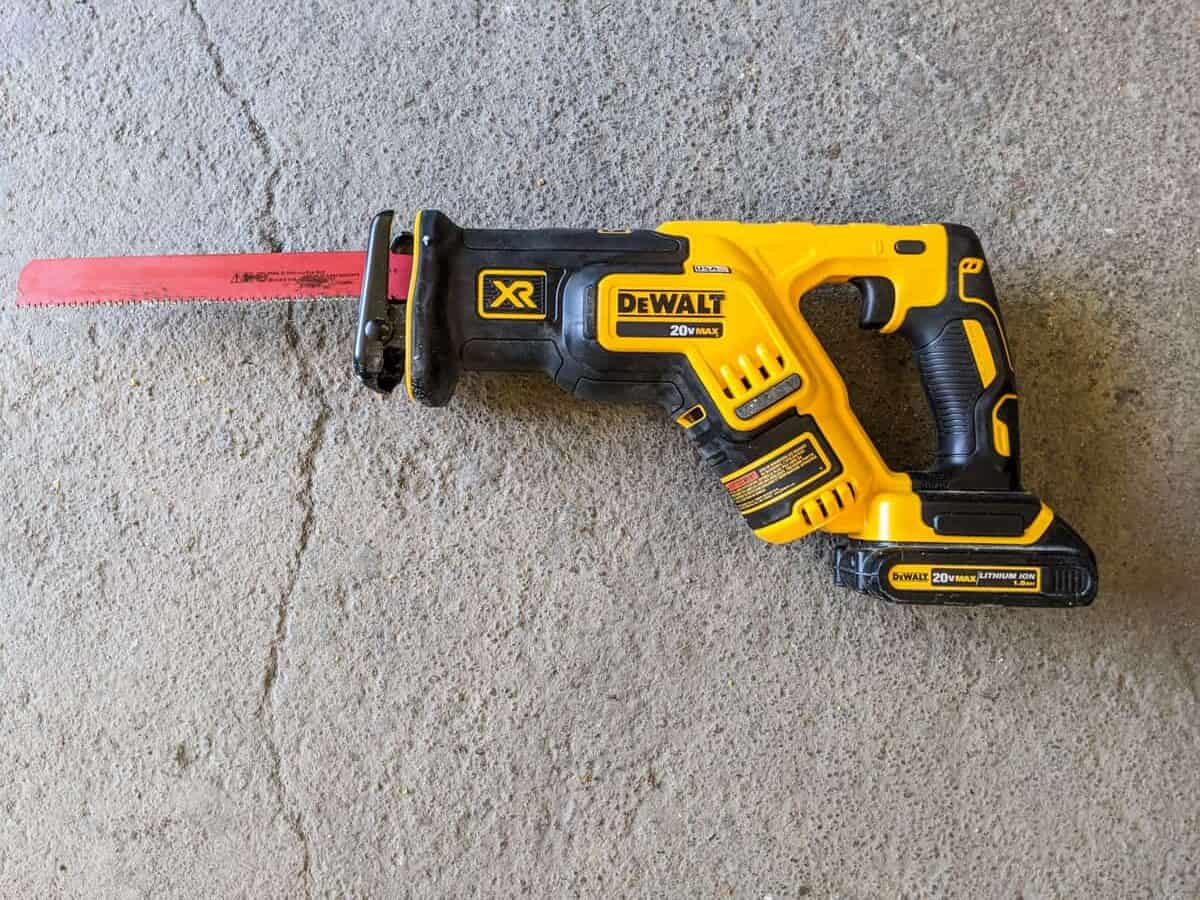
- Reciprocating saw
- Drill and drill bits
- Ratchet to fit bolts
- Wheelbarrow
- Shovel
- Level that attaches to post with rubber band
- Paintbrush
Digging the Post Holes
Step 1: Pick a Good Spot
The following are all things I thought of before choosing a spot for our clothesline.
- Close to the house – If you have to walk a mile from your house and washer, you’re probably not going to use it much.
- Sun AND Shade – A mostly sunny spot is ideal. But some shade is also good for your colored clothes so they won’t fade.
- Not under a Tree (much)– Yeah, you don’t want birds above your clothes. I put mine just slightly under some branches.
- Length of Line – How many people in your family can decide how long you need the wash line to be. I decided on just under 20 feet for our 4 person family, but this is more on the short side for clotheslines. (I will go into detail later on why I chose this length.) Forty – fifty feet is also a good length. CUSTOMIZE this to your space and needs.
Step 2: Decide What You Will Attach Your Line To
- 4 x 4 Posts – This tutorial will walk you through how to build a traditional 4 x 4 post clothesline.
- Deck Posts – Use the retractable clothes line hardware suggested here to simply add to your existing deck and then retract when not in use!
- Privacy Fence Posts – As with the deck, string a short clothes line between your fence posts.
- In Between Buildings – Attach the retractable line suggested here (securely) between the garage and house. Retract when not in use.
- Between One Post and One of the Above Suggestions – Build one 4 x 4 clothesline post outlined here and attach the other end to one of the above.
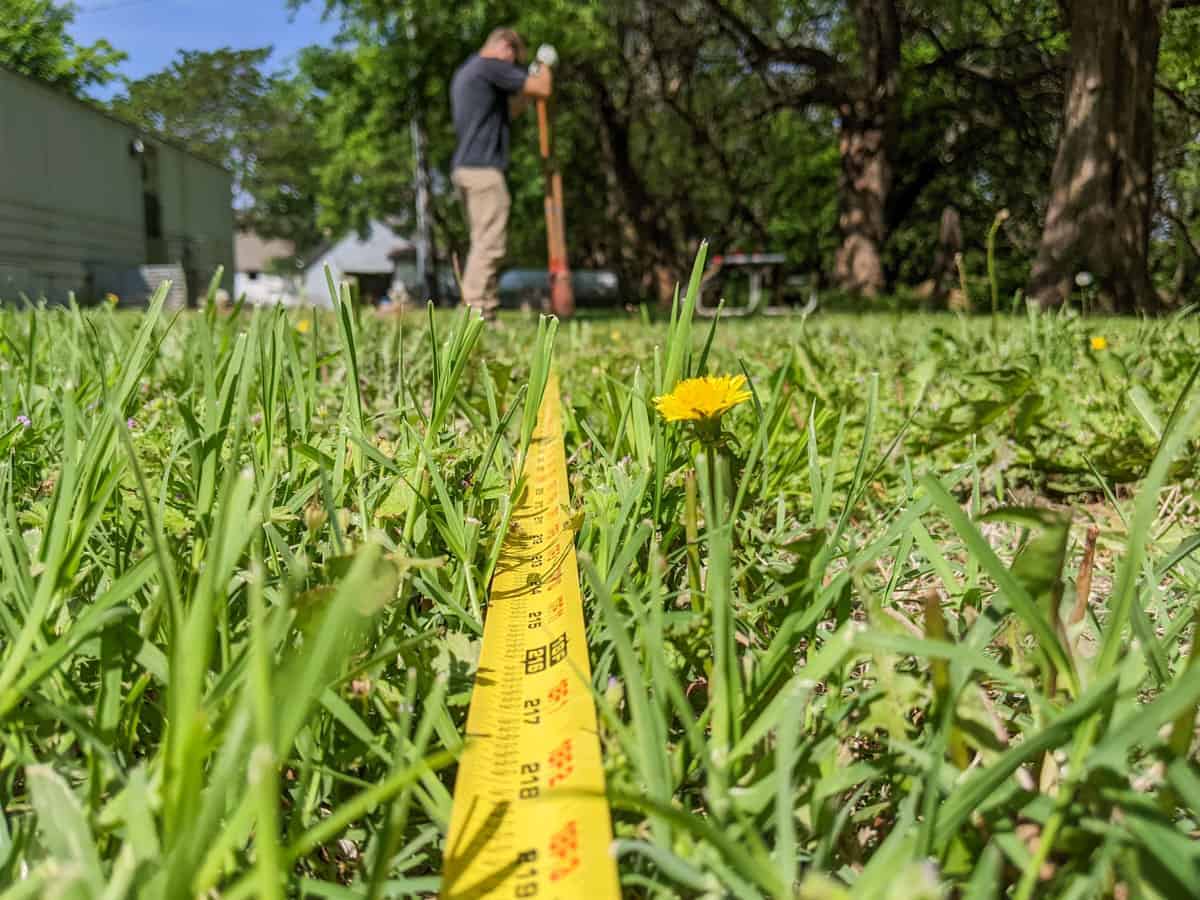
Step 3: Dig Your Holes
- Use a post hole digger to dig one hole to the desired depth – about two feet deep.
**Customizable height option: You want the posts to sit two feet down or close to it, but if you’re shorter, you can bury it deeper for a shorter line. The cross piece will set on top, adding a few inches. Measure how high you can reach. You just want to be sure it’s tall enough for a doubled up sheet to have at least 4 inches clearance from the ground.
- Measure your chosen distance and make it shorter by about 6 inches.
I chose a 20 foot line, but I made the posts about 19 ½ feet apart. Why? Because I can buy a 20 foot line and have a little extra line to work with. If I made the poles 20 feet apart, I would need to buy 40 foot line to have any extra for knots and such.
- Make the holes straight out from each other.
- Stick your post hold digger in the ground where you think the next hole will go, handles front to back.
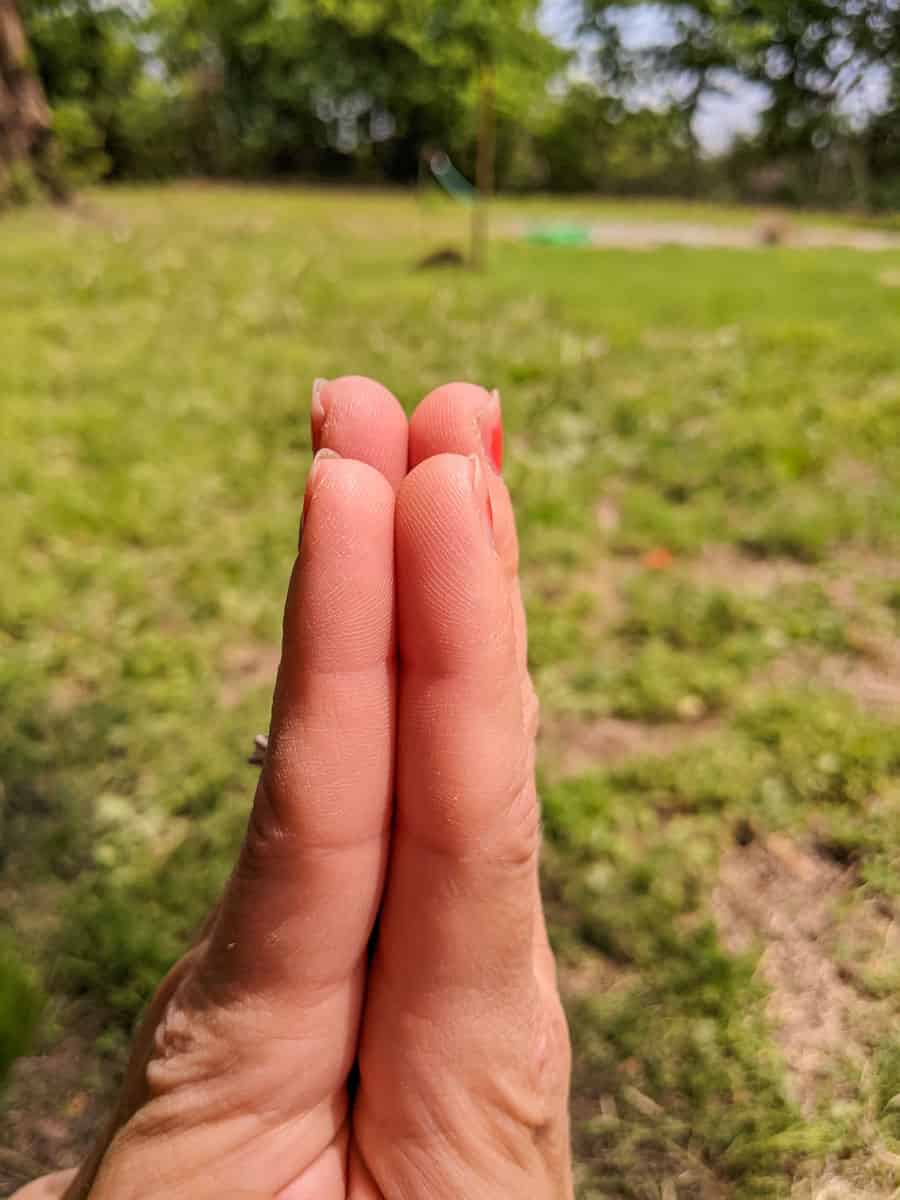
- Squat down with your hands in a prayer position dead center above the existing hole.
- Squint and line the post hole digger handles up in the V that your hands make.
- Have someone move the digger until it lines up in the V.
- Dig your second hole the same depth as the first hole.
Use a tape measure to make sure both are the same.
Building Your Clothes Line Posts
Step 4: Prepare Cross Beams
- Measure and cut with a miter or circular saw one eight foot 4 x 4 post into two 4 foot lengths.
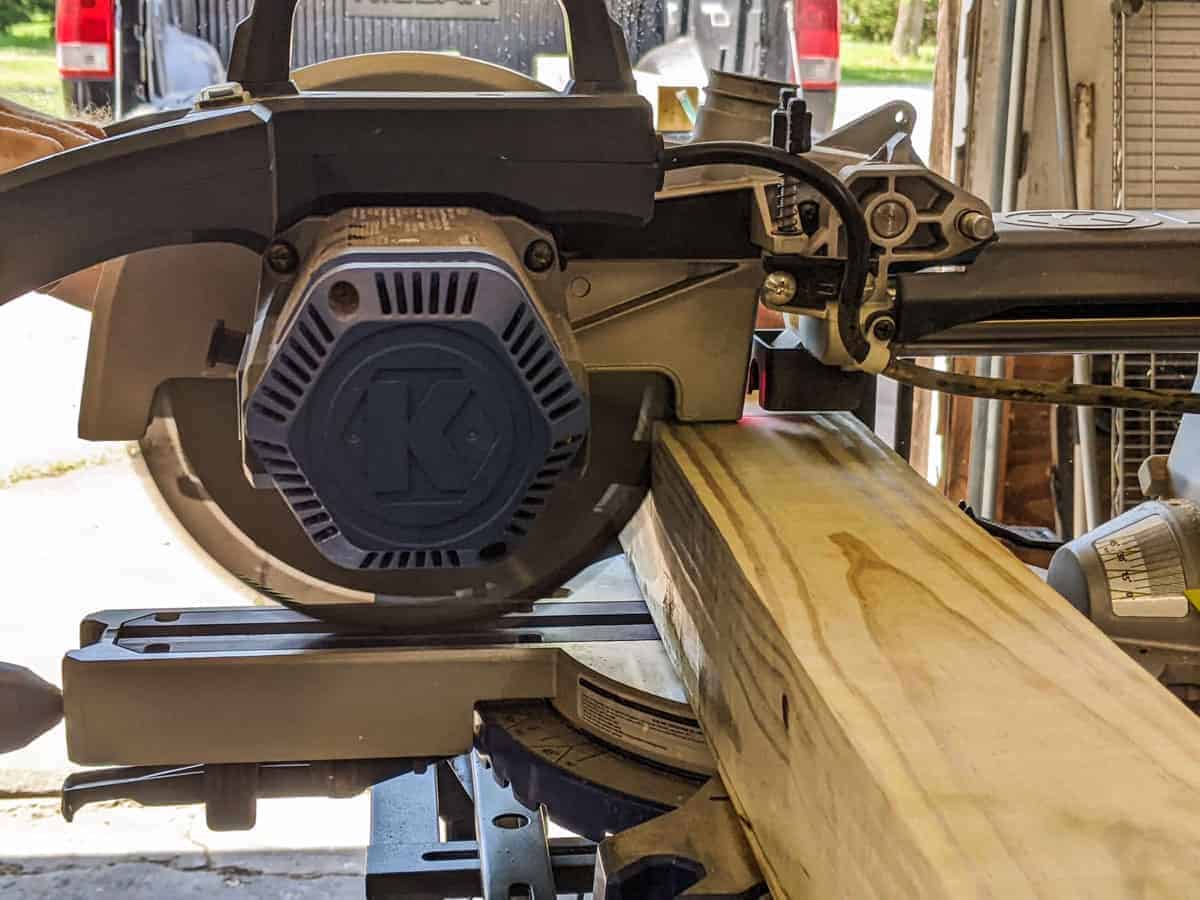
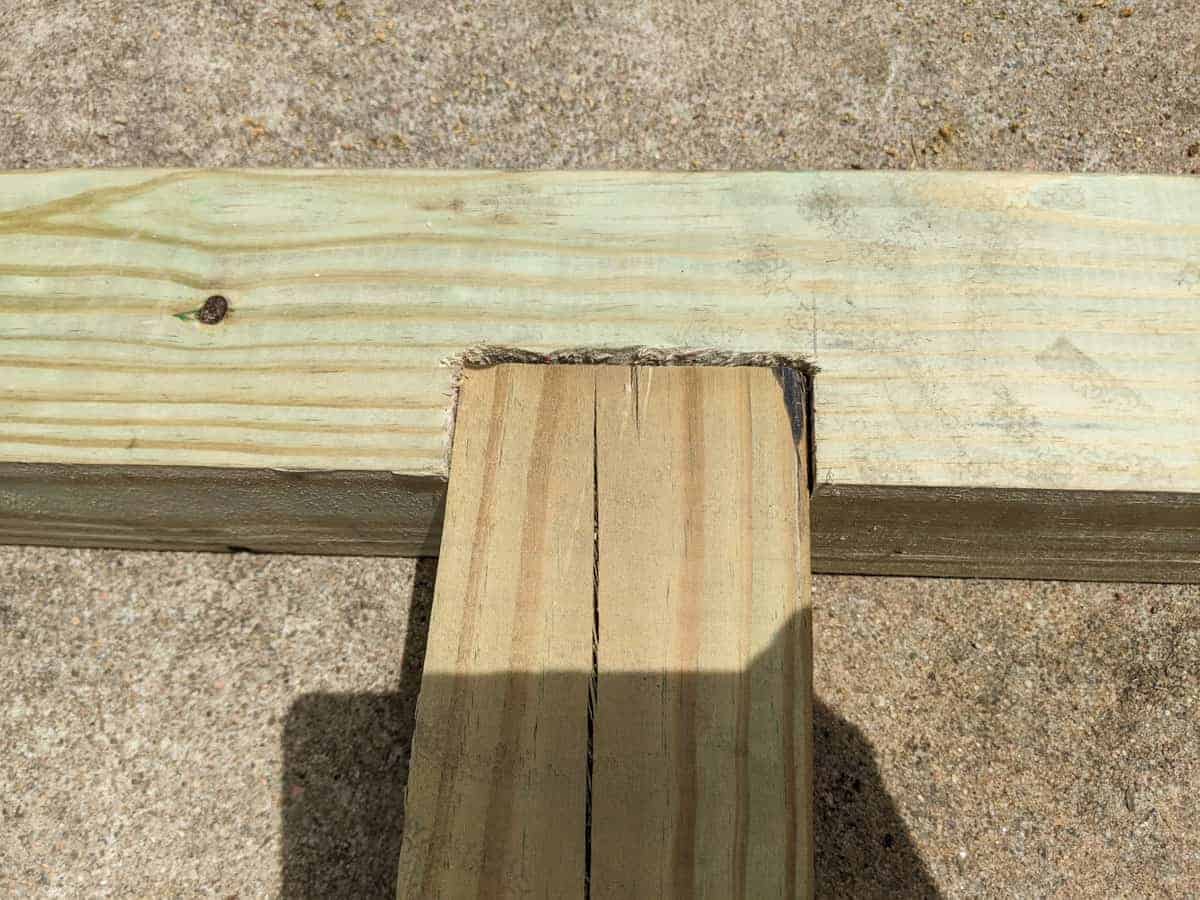
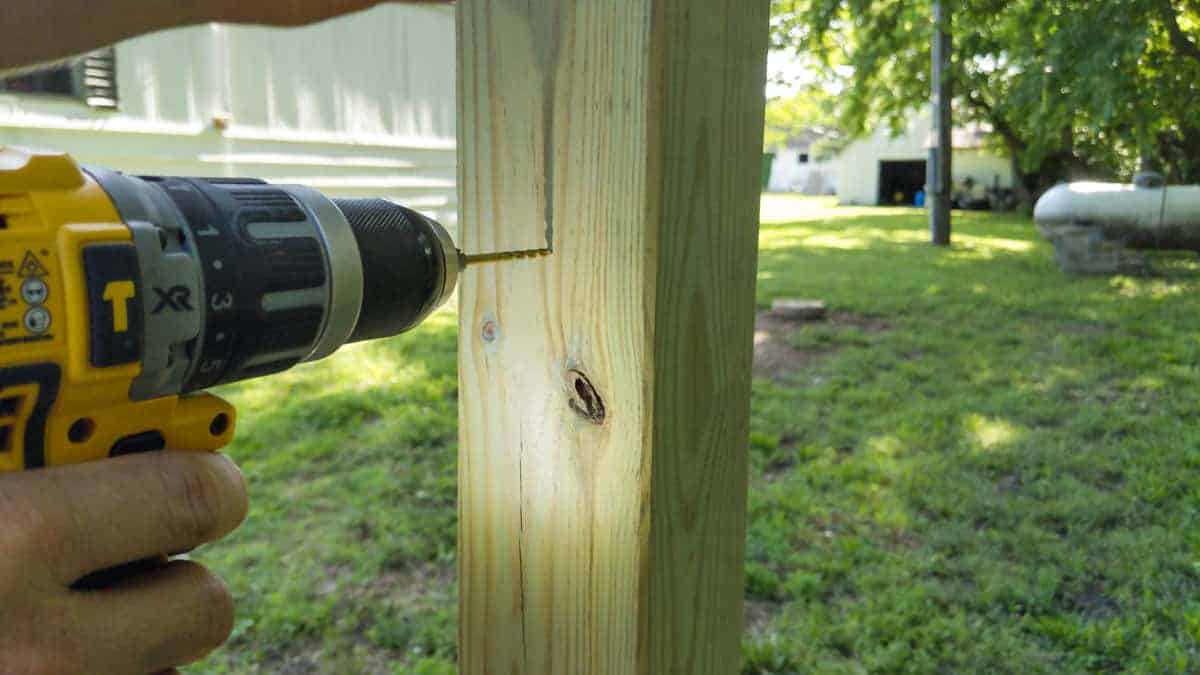
- Measure a 3 ½ inch wide space in the center of each 4 foot crossbeam. This will be your notch.
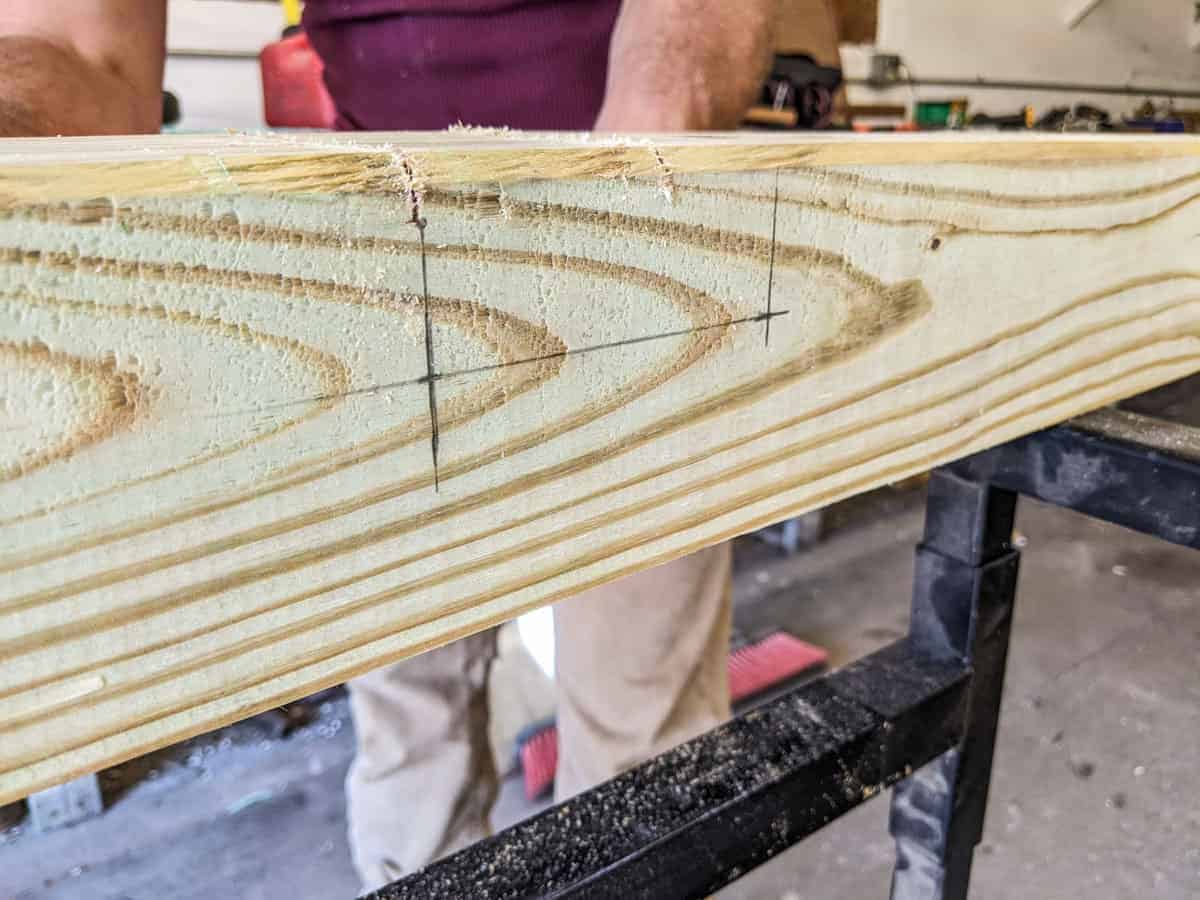
- Use a reciprocating saw to cut your vertical notch lines.

- Cut diagonal and vertical lines to start chipping away the notch.

- Once the blade can go horizontal, cut a flat horizontal line to finish the notch so that it fits snugly into the top of the remaining 8 foot post.
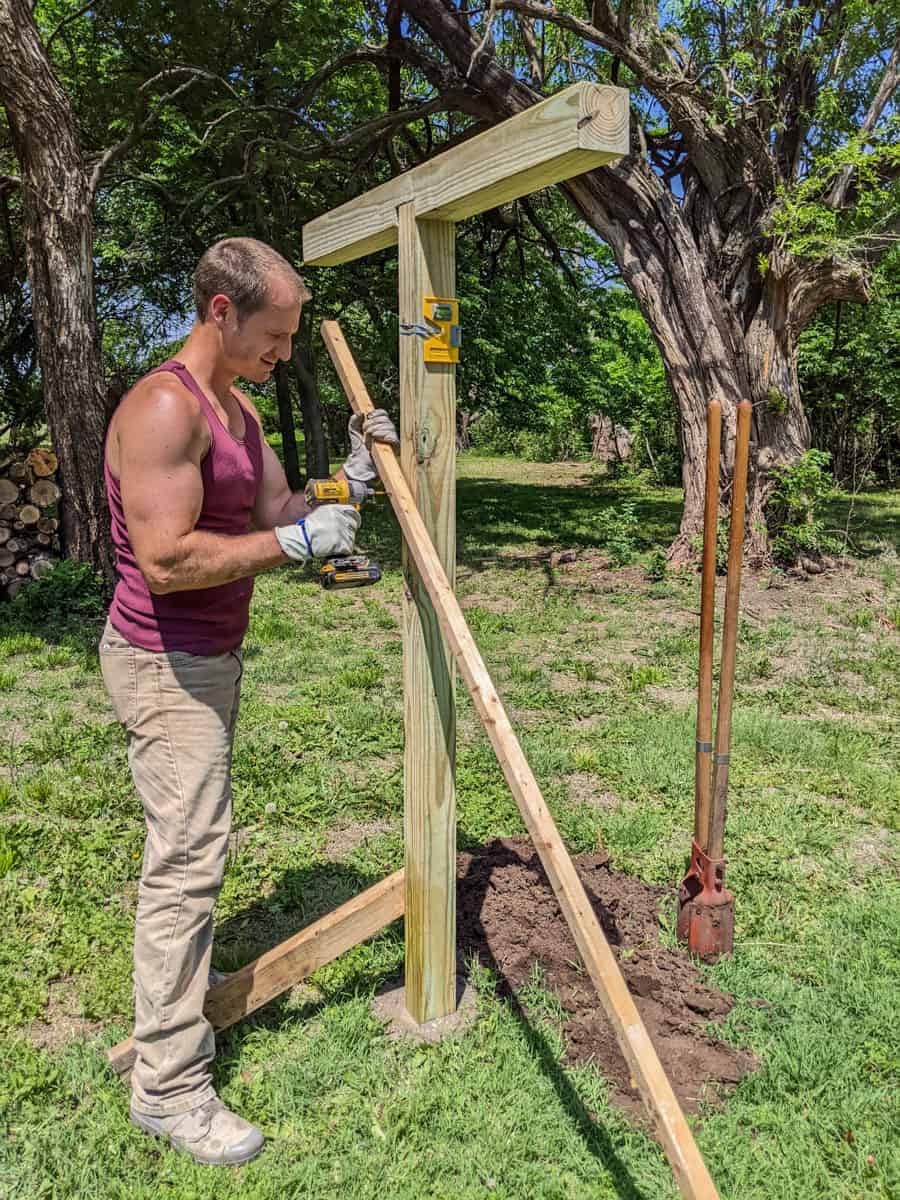
Step 5: Prepare Vertical Wooden Posts
- Fit the cross beam notch into the 8 foot vertical post.
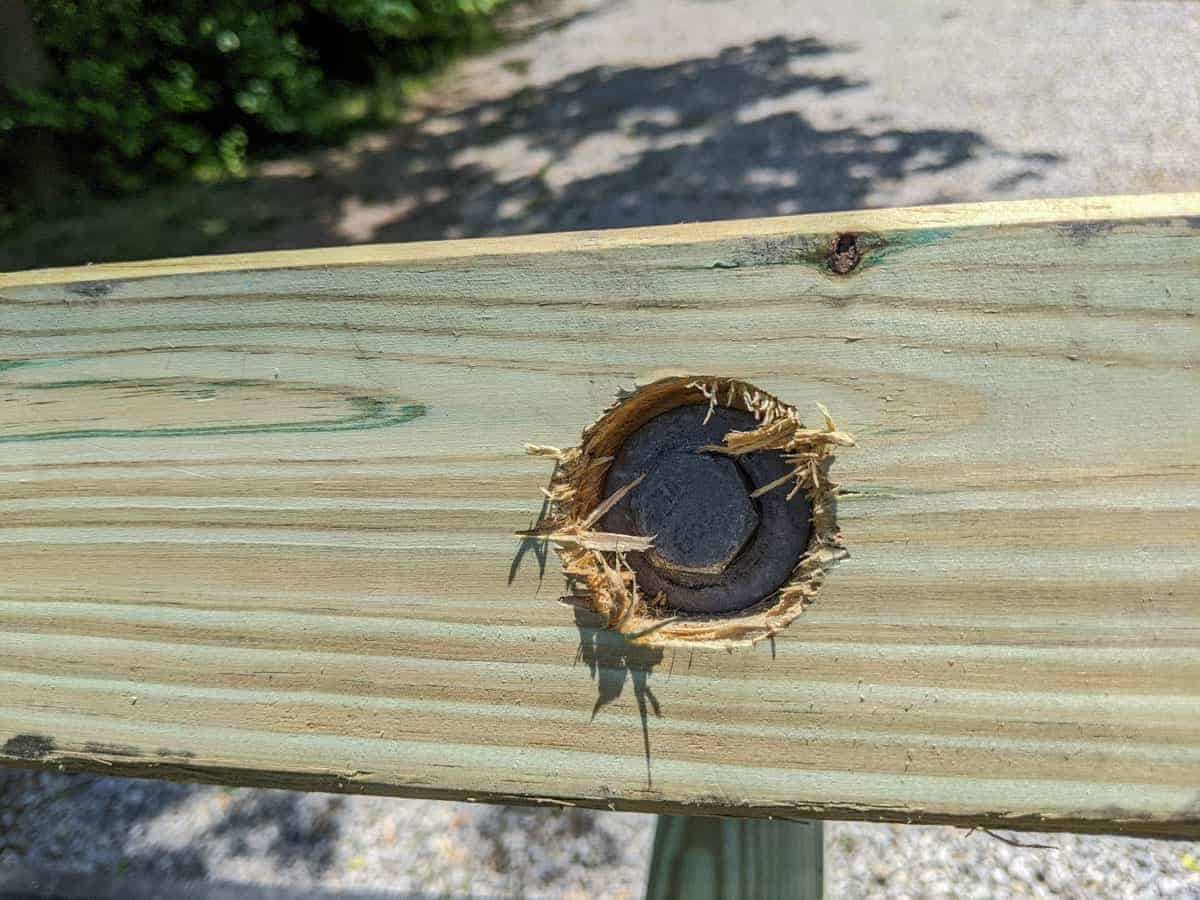
- Once together, drill a hole dead center through cross beam and two inches into the top of your vertical post.
- Fit your bolt through both and tighten with a ratchet or ratchet drill bit.
Setting Your Clothesline Posts
Step 6: Mix the Concrete
- Dump one bag of cement mix into your wheelbarrow.
- Using a hose, add water a little at a time, mixing cement and water in between.
- Continue adding water and mixing with shovel until the cement is a thick, moist consistency. It should hold the shape of a patty when formed and not crumble.
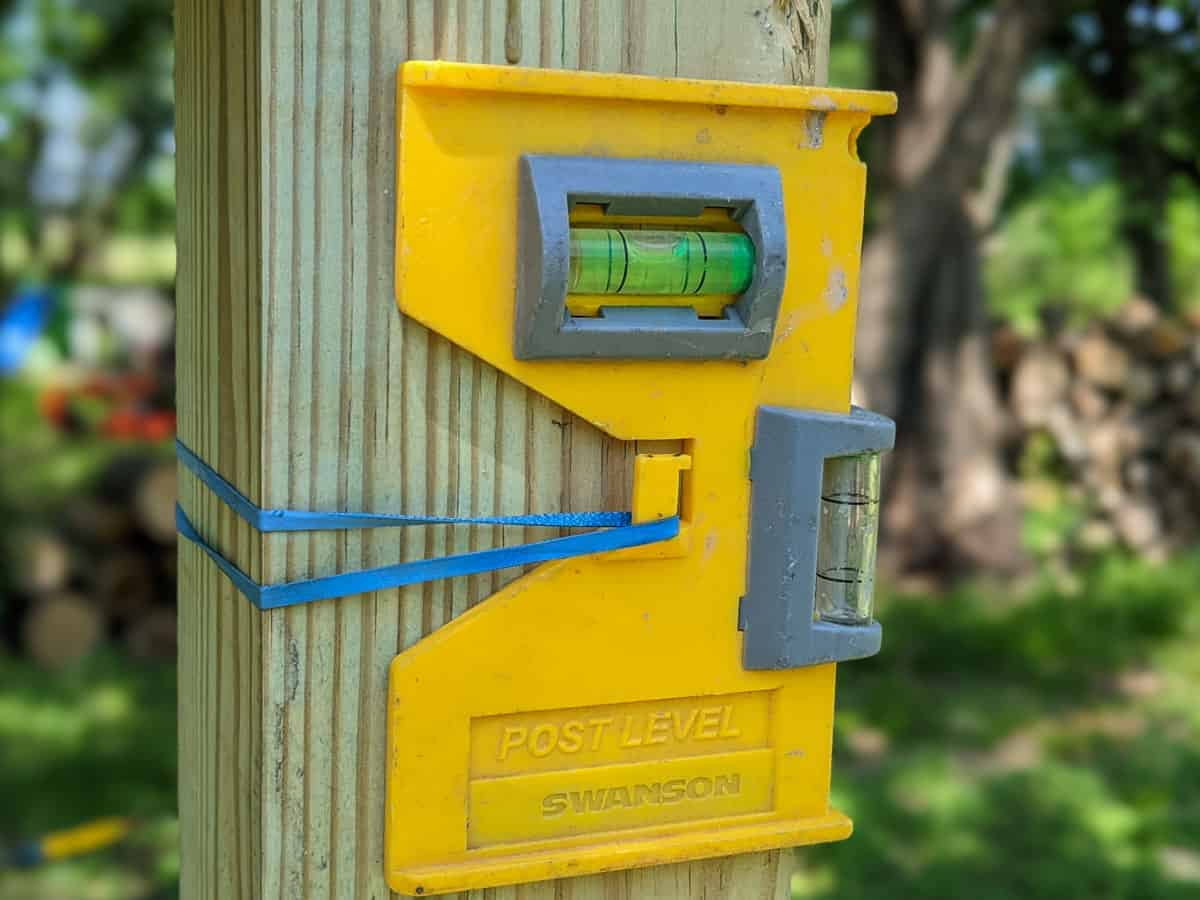
- Set the post in your first hole. Attach the post level to make sure it’s straight in both directions. (You will need a second person to hold the post straight.)
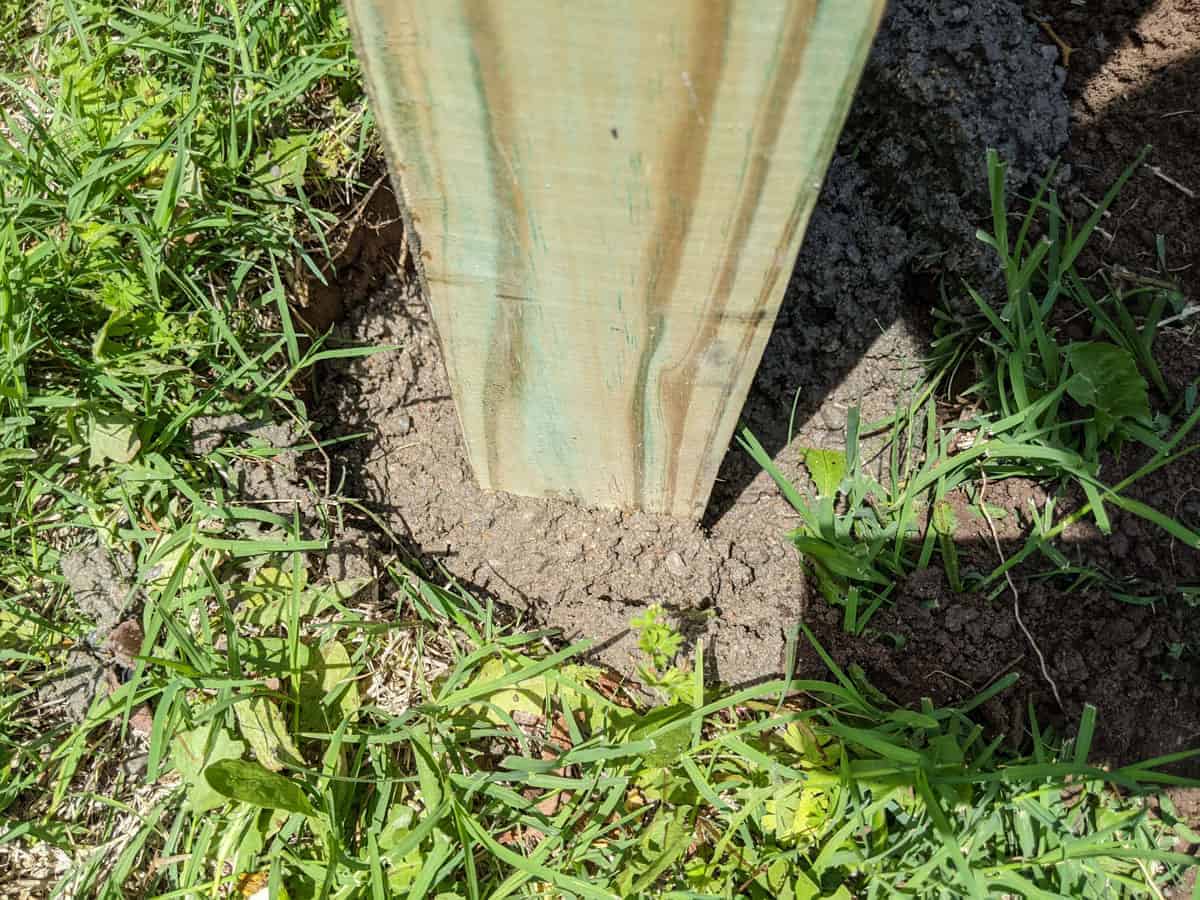
- Shovel in cement into the hole until cement is about 1 inch over the top of the dirt.
- Check the levelness as you go.
Step 7: Build an Angled Frame to Hold Post
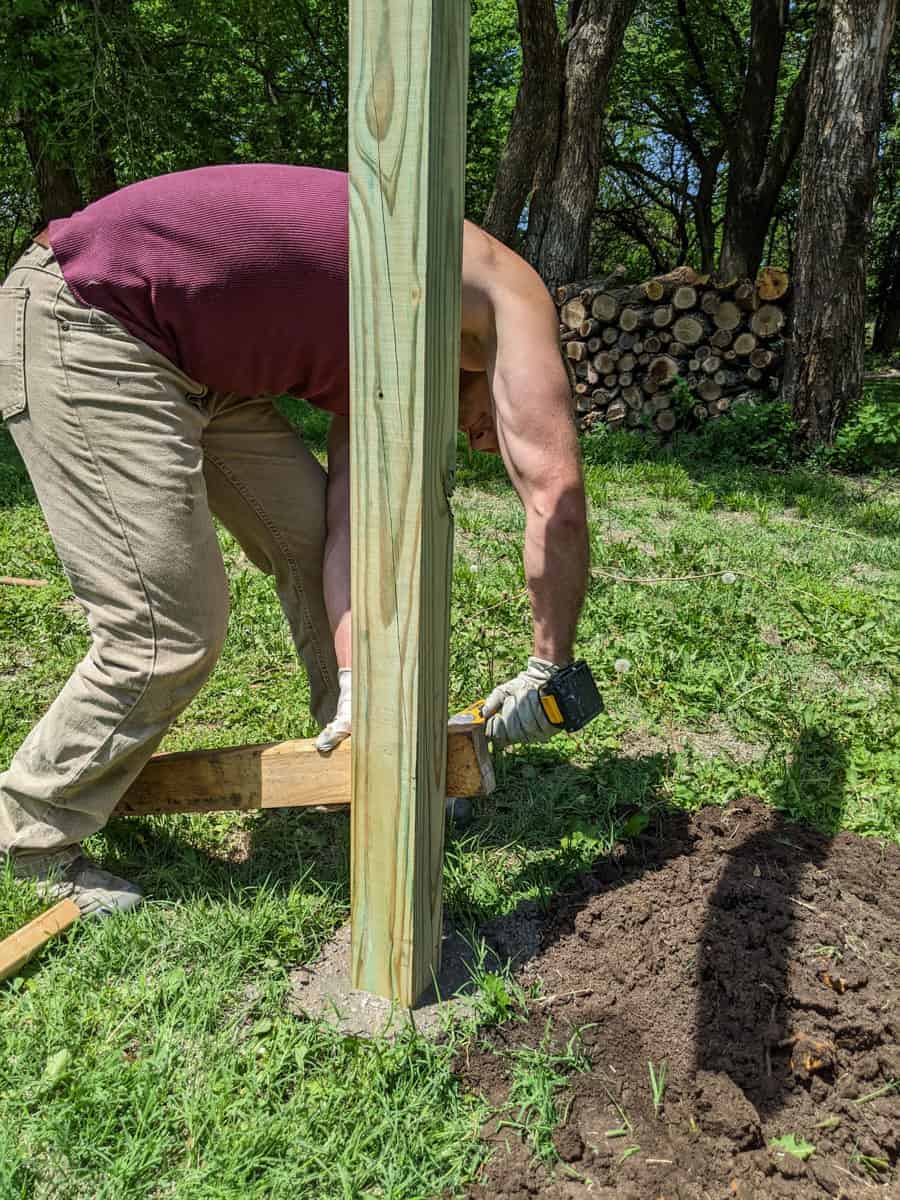
You will need a frame to hold the 4 x 4 post in place while the cement dries.
- Take one piece of scrap lumber about 3 – 4 feet long. Place one end securely on the ground. Angle the other end midway up the vertical 4 x 4 post.
- Screw in the scrap lumber to the post.
- Do the same on the opposite side of the post with another scrap piece of lumber.
- Make sure both pieces are firmly set against the ground. The purpose is simply to hold the post in place. These are not intended to hold it in place if someone bumps against the post.
Step 8: Repeat Steps 6 and 7 for the Second Post
Step 9: Let Posts Rest
- Let cement dry for 24 hours making sure nothing bumps the posts.
- Remove support wood from posts after cement is dry.
Customizing and Painting Your DIY Clothesline
Step 10: Painting the Clothesline
- If you used treated lumber for your 4 x 4 posts, check to see if it’s visibly green. This means you will have to wait up to a month for it to dry before painting.
- If lumber is ready to paint, choose a color and paint away. I did two coats of paint with latex outdoor paint + primer. If the lumber is treated, you can also leave it unpainted.
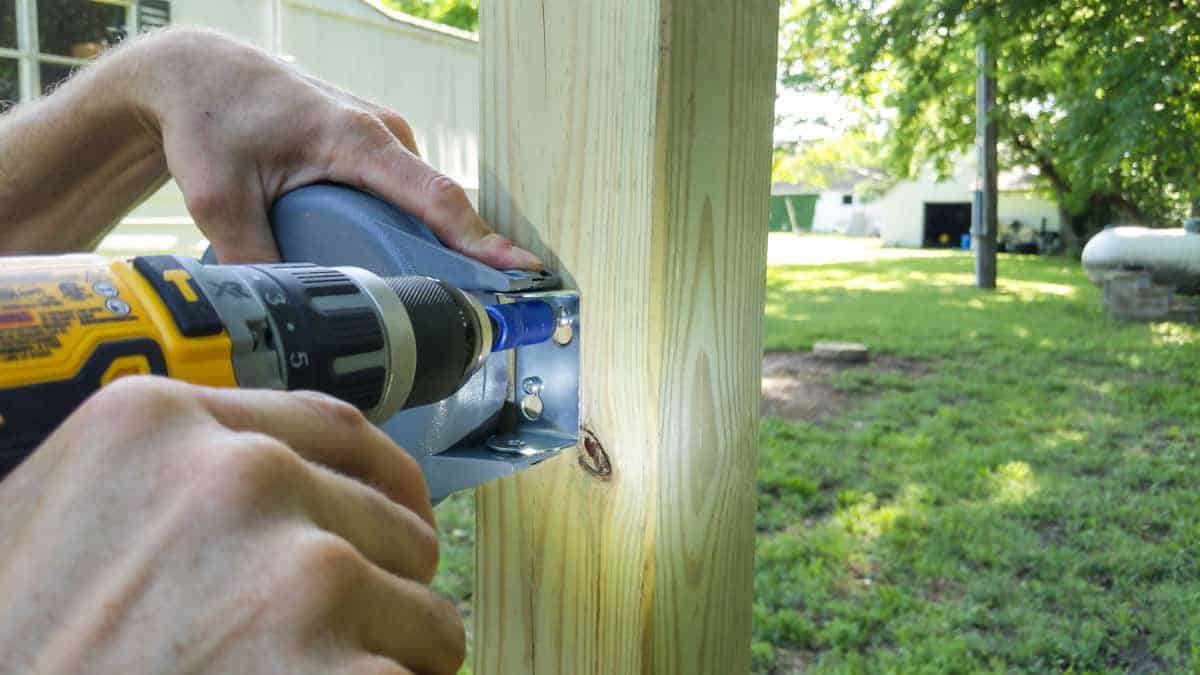
Step 11: Mounting Brackets for the Clothesline
We chose not to do support brackets on our clothesline. Was this a dumb decision? Maybe. But I just didn’t like the look of a chunky 4 x 4 bracket that I saw on all other DIY clotheslines. The cross beam on this clothesline tutorial is completely sturdy. I have tried to wiggle it numerous times, and it is not moving since we cut the groove in the cross beam.
However, in full disclosure, our lumber was green. As it dried, the cross beam on one post did warp down slightly. It is not very noticeable and does not effect the structural soundness of the post. It just is what it is.
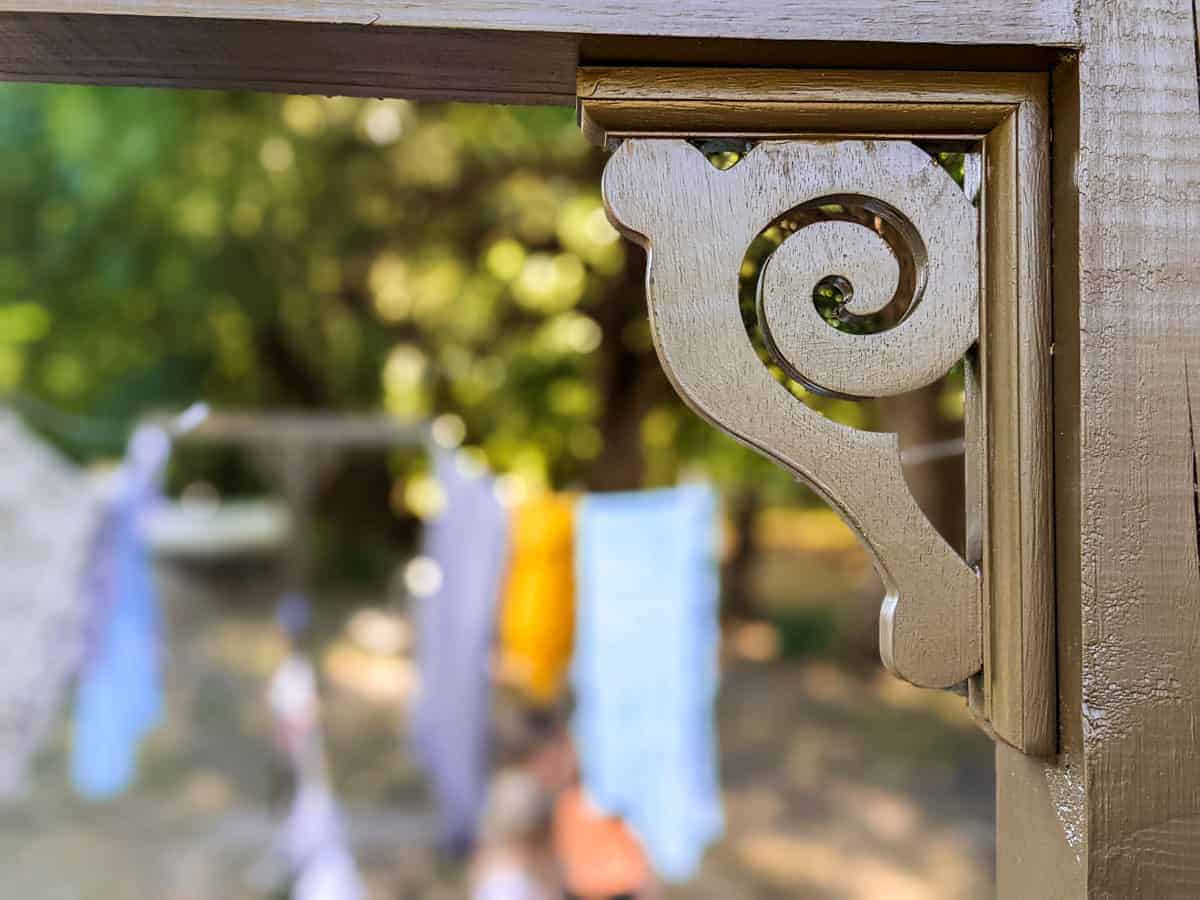
I decided to add some small decorative brackets just because. This is totally up to each individual as it is merely for looks. It does add to the cost but can be fully customizable depending on your vintage style.
- Paint brackets before installing
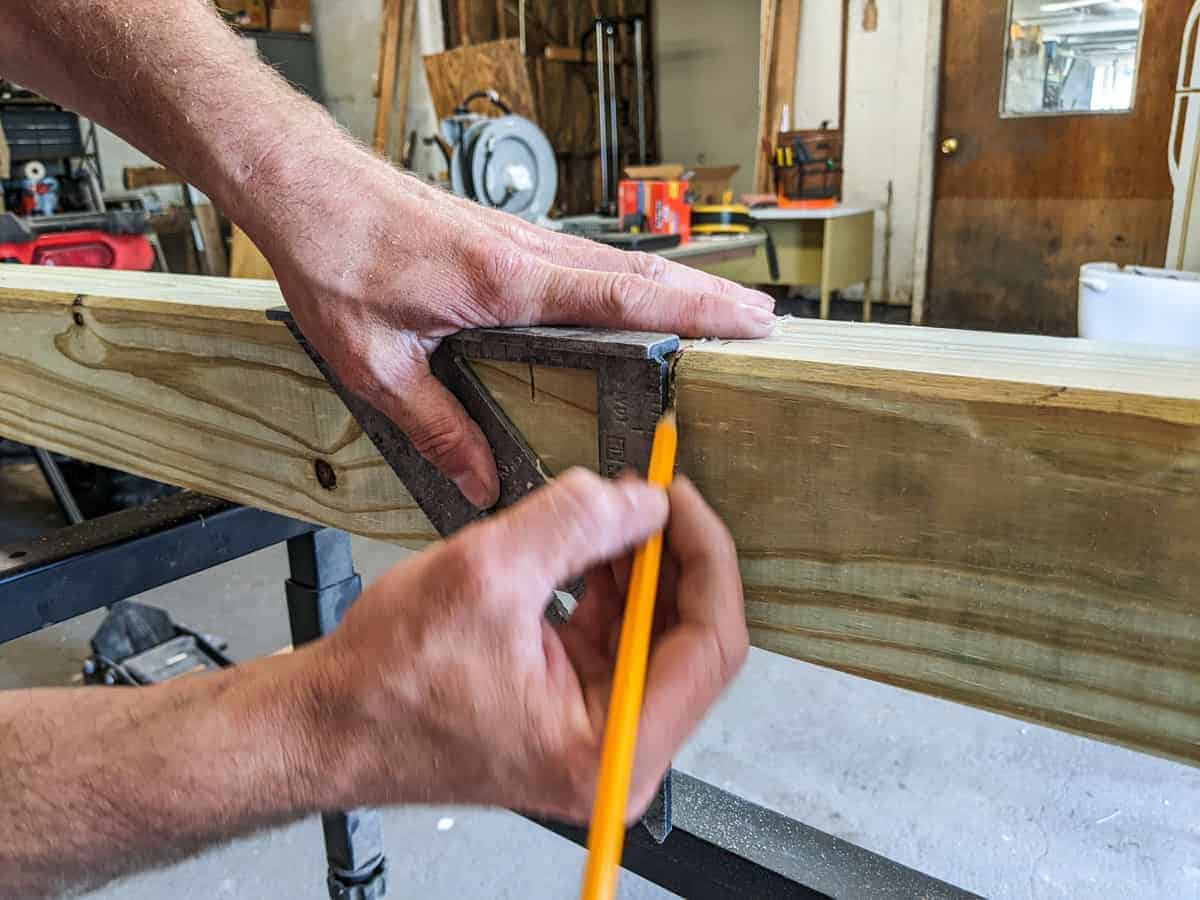
- Mark where bracket should be with a pencil.
- Drill in screw and mount bracket.
Attaching the Clotheslines
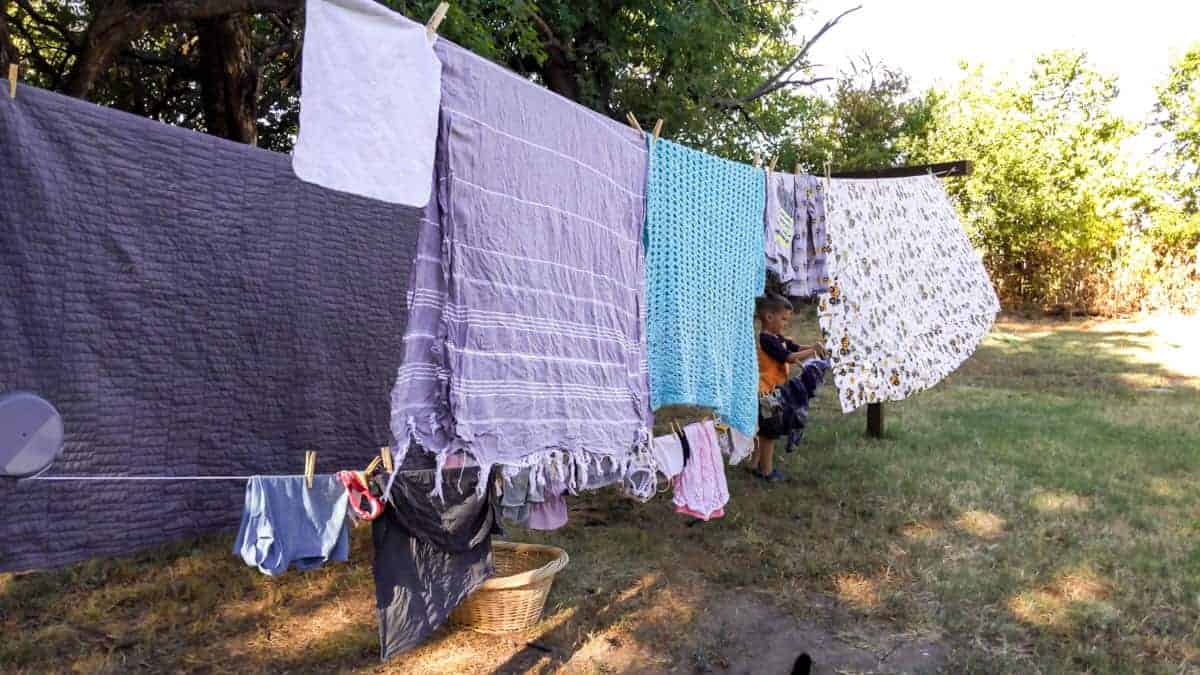
I bought and experimented with at least seven different types of wire clothesline to make sure we were using the best option. I settled on the top lines to be plastic coated steel wire with a clothesline tightener included. For the mommy’s helper kid’s height clothesline, I chose a retractable clothesline that works amazingly. I wanted to be able to roll the bottom one up in case we wanted to walk back and forth.
Depending on where you mount your clothesline, you may choose to use just the retractable clotheslines. These are great options for “adult” laundry as well. We used them on the top for several weeks, and I liked them. They did sag a bit but could be tightened very easily and quickly. They help up a full load of laundry, including bath towels. So I have full confidence in the retractable lines working long term.
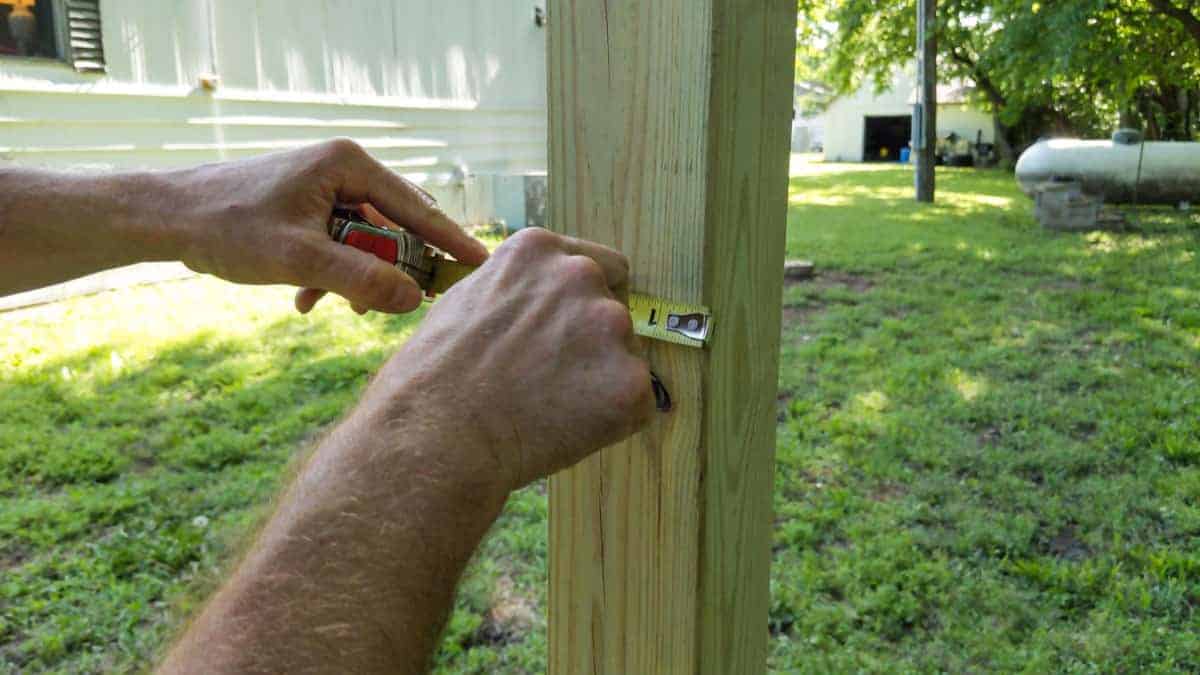
- Drill holes in the post where the lines will be strung.
- Assemble the steel clothesline with tightener according to the package directions.
- Screw in the steel clothesline to both posts with a drill.
- Screw the tightener to make a taut line.
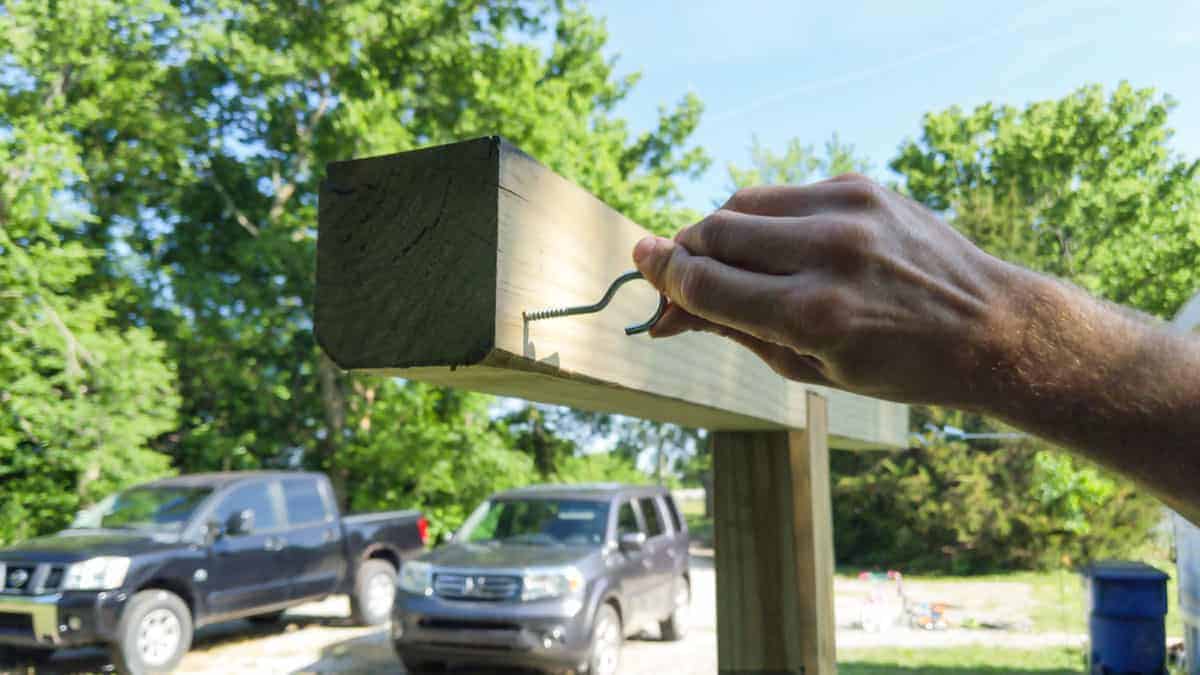
Retractable Mommy’s Helper Child Height Clothesline
- Bring your shortest child out and see how high they can reach to see how tall to mount the line.
- Mark the spot on the post where the clothesline will be mounted.
- Drill in screws to mount the line.
- Attach the hook on the other pole to string the line.
I’m glad you joined me for this step by step clothesline tutorial with mommy’s helper clothesline. We certainly love having our clothesline during this hot, hot summer. It has greatly saved us money and heat generated in poor ol’ Bertha, the mobile home with an ancient air conditioning unit. My little people enjoy having their own clothesline, too.

My mom always said she enjoyed hanging laundry out to dry, and I always thought she was a bit crazy. All I could remember was having to interrupt my summer reading of Nancy Drew to lug in the laundry basket in the sweltering heat.
But now, I get it. Hanging out laundry as a mom, IS relaxing and a bit therapeutic. There’s something about a simple task. It’s a great way to slow me down, even for a bit. It makes me notice the birds and locusts. It gives me a moment to think and reflect. Yes, mom, once again, you were right. Hanging laundry is fun.
Comment below and tell me if you’ve ever hung laundry out to dry! Or let me know any questions you may have about the benefits of a DIY clothesline. I would love to help!
Pin for Later Step By Step Clothesline Tutorial [With Mommy’s Helper Clothesline]